Introduction
Portulaca, commonly known as moss rose or purslane, is a vibrant, low-growing succulent that thrives in various conditions, making it a favorite among gardeners worldwide. With its colorful blooms and succulent leaves, Portulaca is not only easy to care for but also simple to propagate. This guide will delve into the various techniques for propagating Portulaca plants at home, ensuring that you can expand your garden effortlessly.
Latest Posts
- With Just 1 Bottle of Water How I Was Shocked by What Happened When Growing Vegetables
- Maximize Your Home Garden with the Hanging Pea Sprout Growing Model – Space-Saving, High-Yield, and Easy-to-Manage Vertical Gardening Solution
- Just Water – The Secret to Growing Plump, White Peanut Sprouts Right at Home: A Step-by-Step Guide for Beginners
- Growing Zucchini at Home in a Container: How to Cultivate Large, Long Fruits with a 1-to-72 Day Step-by-Step Diary for Maximum Yield
- Grow Long Beans on the Terrace in Used Recycling Baskets: The Ultimate Guide to Easy, Space-Saving, and High-Yield Terrace Gardening
- How to Grow Tons of Long Beans Easily Without a Garden – A Complete Guide to Growing Healthy Yardlong Beans Without Fertilizers or Pesticides
- Easy Long Bean Growing Trick – No Garden, No Fertilizer, No Pesticide
- Grow Bitter Melon in Bottles — Harvest So Big You Can’t Eat It All! The Ultimate Guide to Bottle Gardening for Maximum Yields
- Growing Garlic Made Easy: No Soil, Fast Results – The Ultimate Guide to Growing Fresh Garlic Indoors Without Traditional Soil
- Wall-Mounted Hydroponic Watermelon System: Grow Large, Juicy, and Delicious Watermelons at Home with Minimal Space and Maximum Yield
Understanding Portulaca
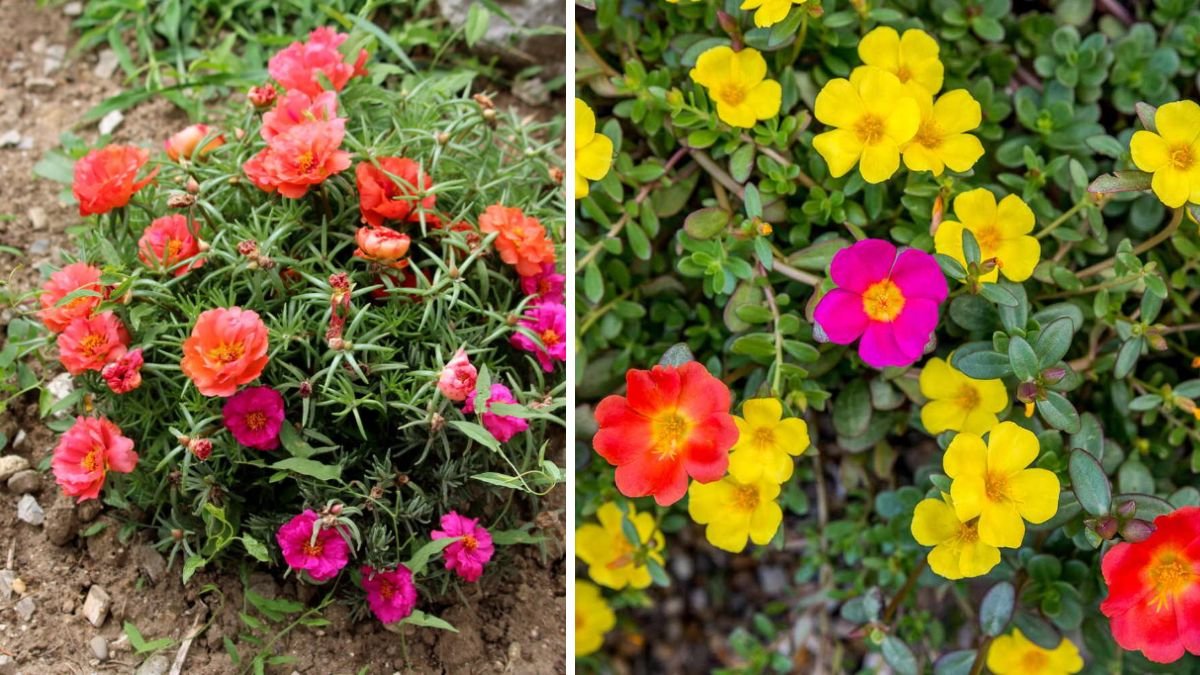
Before we jump into propagation techniques, it’s essential to understand the plant itself. Portulaca is a drought-tolerant plant that thrives in poor soil and thrives under full sun. It’s known for its colorful flowers, which can range from yellow, orange, pink, to red. These hardy plants generally bloom from late spring to late summer, offering a stunning display of color in any garden.
Benefits of Propagating Portulaca
- Cost-Efficient: Growing new plants from cuttings or seeds saves money compared to purchasing new plants from a nursery.
- Personal Satisfaction: Watching your plants grow from cuttings can be immensely satisfying.
- Garden Maintenance: Propagation helps in maintaining lushness and health in your garden.
- Variety: You can create diverse landscapes using various colors of Portulaca.
Propagation Techniques
1. Seed Propagation
Materials Needed:
- Portulaca seeds
- Seed starting soil
- Seed trays or small pots
- Light source (grow lights or sunny window)

Steps:
-
Prepare the Soil: Fill your seed trays or pots with seed-starting soil. Ensure it is light and well-draining.
-
Sowing the Seeds: Sprinkle the seeds evenly on the surface of the soil. Do not bury them; Portulaca requires light for germination.
-
Watering: Mist the soil gently to moisten it without creating puddles. Be careful not to wash the seeds away.
-
Light: Place the trays in a location where they can get plenty of sunlight or under grow lights. Maintain a warm temperature (around 70-80°F) for optimal germination.
-
Thinning: Once the seedlings develop their first few true leaves, thin them to avoid overcrowding. Space the seedlings about 2-3 inches apart.
-
Transplanting: After the seedlings grow strong enough, typically in 4-6 weeks, they can be transplanted outdoors after the last frost.
2. Stem Cuttings
Materials Needed:
- Sharp scissors or pruners
- A small pot
- Well-draining soil (mix of potting soil and sand)
- Water

Steps:
-
Select a Healthy Stem: Look for a healthy Portulaca plant and choose a stem with several leaves.
-
Cut the Stem: Using sharp scissors or pruners, cut a 4-6 inch long piece of stem just below a leaf node.
-
Prepare the Cutting: Remove the lower leaves, leaving only a few at the top. This helps reduce water loss during rooting.
-
Rooting Hormone (Optional): If desired, dip the cut end in rooting hormone to encourage quicker root development.
-
Plant the Cutting: Insert the cutting into a small pot filled with well-draining soil. Water lightly to establish contact with the soil.
-
Light and Humidity: Place the pot in a warm, bright location but out of direct sunlight for a week or so. Covering it with a plastic bag can create a humid environment to promote rooting.
-
Watering and Monitoring: Keep the soil lightly moist but not soggy. After a few weeks, gently tug on the cutting to see if it has developed roots; if it resists, it’s ready for transplanting.
3. Leaf Cuttings
Materials Needed:
- Healthy Portulaca leaves
- Well-draining soil
- Small pots
- Water

Steps:
-
Select Healthy Leaves: Choose mature, healthy leaves from a Portulaca plant.
-
Cut the Leaves: Using scissors, carefully remove the leaves from the stem.
-
Preparing the Soil: Fill small pots with well-draining soil.
-
Plant the Leaves: Press the cut end of each leaf into the soil, ensuring at least half of the leaf is buried.
-
Watering: Mist the soil lightly to moisten it.
-
Light and Humidity: Similar to stem cuttings, place the pots in a warm, bright spot and cover them with a plastic bag for humidity.
-
Roots Development: Within a few weeks, roots will develop from the leaf cuttings, and you can transplant them once they grow strong enough.
Caring for New Plants
Once you have propagated your Portulaca, proper care is crucial for successful growth.
Watering

Portulaca is drought-tolerant and prefers infrequent watering. Allow the soil to dry out between waterings to prevent root rot.
Sunlight
Ensure your Portulaca plants receive full sunlight for at least six hours a day for optimal growth and blooming.
Fertilizer
While Portulaca is not a heavy feeder, a balanced, water-soluble fertilizer can be applied during the growing season (spring and summer) to encourage more vibrant blooms.
Pest Control
Watch for common pests such as aphids or spider mites. Treat infestations with insecticidal soap or neem oil, ensuring to follow the instructions on those products.
Pruning
Regularly deadhead spent blooms to encourage new growth and maintain appearance. Prune leggy stems to promote a bushier plant.
Common Challenges in Portulaca Propagation
-
Poor Germination Rates: This can result from old seeds or incorrect soil conditions. Always use fresh seeds and ensure the soil drains well.
-
Cuttings Not Rooting: If cuttings fail to root, reassess the moisture levels and light conditions. Cuttings must be kept in a humid environment but not soaked.
-
Overwatering: This is the most common problem with succulents. Ensure pots have drainage holes and allow the soil to dry out between watering.
FAQs

Q1: How long does it take for Portulaca to germinate from seed?
A: Portulaca seeds generally take about 7 to 14 days to germinate under optimal conditions.
Q2: Can I propagate Portulaca in water?
A: While Portulaca can be started in water, it is less common. It is better to propagate in soil for better success.
Q3: When is the best time to propagate Portulaca?
A: The best time to propagate Portulaca is in the spring when temperatures are warm, and the plant is actively growing.
Q4: How often should I water my newly propagated plants?
A: Water newly propagated plants sparingly; once the top inch of soil is dry, it’s time to water again.
Q5: Can Portulaca be grown indoors?
A: Yes, Portulaca can be grown indoors, but it requires a sunny spot or supplemented light as it thrives in full sunlight.
Q6: Why are my Portulaca plants not flowering?
A: Insufficient sunlight, overwatering, or poor soil conditions can lead to reduced flowering. Ensure they are in full sun and the soil drains well.
Conclusion
Propagating Portulaca at home is a rewarding endeavor, whether you choose to cultivate from seeds, stem cuttings, or leaf cuttings. With the right techniques and care, you can easily expand your collection of these vibrant plants, beautifying your garden effortlessly. Enjoy the journey of plant propagation, and revel in the splendor of your growing Portulaca!