Growing okra (Abelmoschus esculentus) in containers is a rewarding endeavor that allows you to enjoy this unique and nutritious vegetable even if space is limited. This comprehensive guide will walk you through every aspect of successfully growing okra in containers, from choosing the right varieties and containers to mastering watering, fertilizing, and pest management. By the end of this article, you’ll be ready to cultivate your own delicious bounty of okra at home.
1. Understanding Okra: An Overview
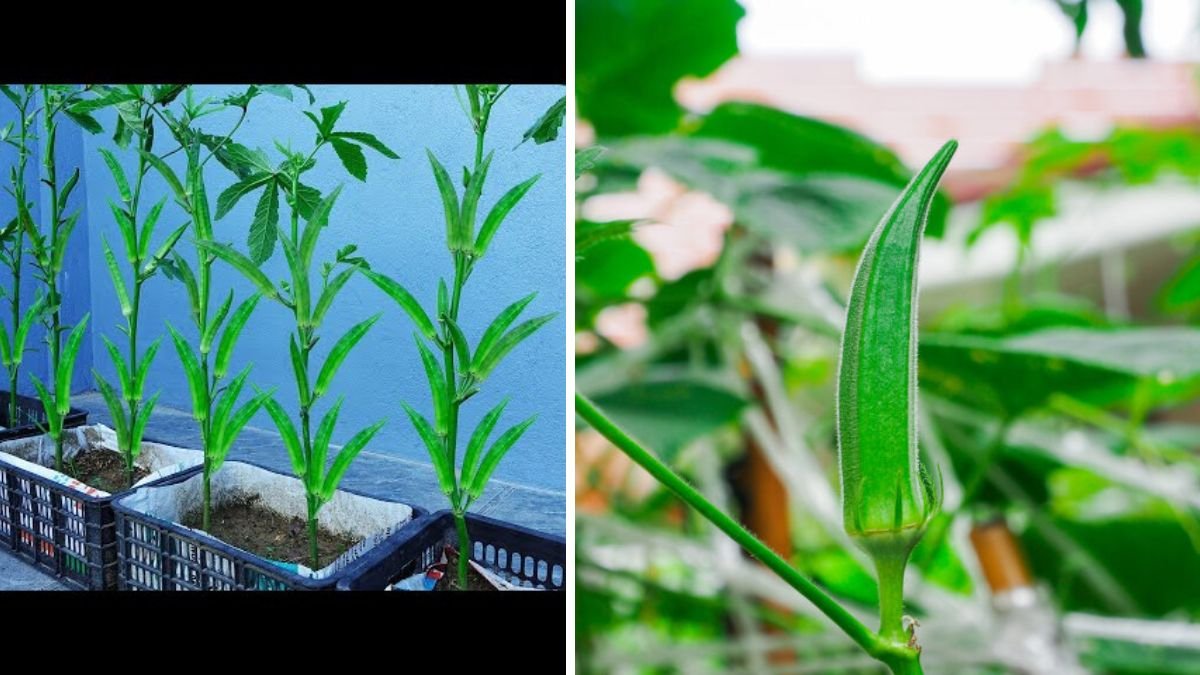
Okra is a warm-season vegetable that thrives in hot weather. Originating from Africa, it is characterized by its long green pods that are often used in soups, stews, and as fried snacks. Besides its delightful culinary qualities, okra is rich in vitamins A and C, fiber, and antioxidants, making it a nutritious addition to any diet.
Latest Posts
- With Just 1 Bottle of Water How I Was Shocked by What Happened When Growing Vegetables
- Maximize Your Home Garden with the Hanging Pea Sprout Growing Model – Space-Saving, High-Yield, and Easy-to-Manage Vertical Gardening Solution
- Just Water – The Secret to Growing Plump, White Peanut Sprouts Right at Home: A Step-by-Step Guide for Beginners
- Growing Zucchini at Home in a Container: How to Cultivate Large, Long Fruits with a 1-to-72 Day Step-by-Step Diary for Maximum Yield
- Grow Long Beans on the Terrace in Used Recycling Baskets: The Ultimate Guide to Easy, Space-Saving, and High-Yield Terrace Gardening
- How to Grow Tons of Long Beans Easily Without a Garden – A Complete Guide to Growing Healthy Yardlong Beans Without Fertilizers or Pesticides
- Easy Long Bean Growing Trick – No Garden, No Fertilizer, No Pesticide
- Grow Bitter Melon in Bottles — Harvest So Big You Can’t Eat It All! The Ultimate Guide to Bottle Gardening for Maximum Yields
- Growing Garlic Made Easy: No Soil, Fast Results – The Ultimate Guide to Growing Fresh Garlic Indoors Without Traditional Soil
- Wall-Mounted Hydroponic Watermelon System: Grow Large, Juicy, and Delicious Watermelons at Home with Minimal Space and Maximum Yield
1.1 Varieties of Okra
Before diving into the cultivation process, it’s essential to choose the right variety of okra for your container garden. Some popular options include:
- Clemson Spineless: A common choice with smooth, spineless pods, making harvesting easier.
- Burgundy: Known for its stunning reddish-purple pods. It retains its color even when cooked.
- Emerald: A high-yield variety that produces thick, tender pods.
1.2 Ideal Growing Conditions
Okra thrives in warm weather and prefers well-drained, nutrient-rich soil. It requires full sun, so select a location where the plants will receive at least six hours of direct sunlight daily.
2. Choosing the Right Container
When growing okra in containers, the choice of container is crucial. Here are some key considerations:
2.1 Container Size

Okra plants can grow quite tall (up to 5 feet), requiring ample space for both root development and plant growth. Use containers that are at least 5 gallons in size. Larger containers will hold moisture better and provide room for growth.
2.2 Material
Containers can be made from a variety of materials, including:
- Plastic: Lightweight and available in various sizes.
- Wood: Offers good insulation but requires proper treatment to prevent rot.
- Ceramic: Attractive but heavy; ensure they have adequate drainage holes.
2.3 Drainage
Proper drainage is essential for container gardening. Ensure your container has drainage holes to prevent waterlogging, which can lead to root rot.
3. Soil Preparation
The right soil mix is vital for healthy okra plants. Here’s how to create a suitable medium:
3.1 Soil Composition
A good potting mix for okra should include:
- Organic matter: Such as compost or well-rotted manure, to improve fertility.
- Peat moss: To enhance moisture retention.
- Perlite or vermiculite: For aeration and drainage.

A recommended ratio is 1 part compost, 1 part peat moss, and 1 part perlite.
3.2 pH Level
Okra prefers slightly acidic to neutral soil (pH between 6.0 and 7.0). Conduct a soil test to ensure the pH falls within this range. Amend as necessary with lime to raise pH or sulfur to lower it.
4. Planting Okra Seeds
Once your container is prepared, it’s time to plant the seeds. Here’s how:
4.1 When to Plant
In most regions, okra is best planted after the last frost date when the soil temperature is consistently above 65°F (18°C). This typically translates to late spring or early summer.
4.2 Seed Preparation
To enhance germination, soak the seeds in water for 24 hours before planting. This helps to soften the seed coat.
4.3 Planting Depth
Plant the seeds about 1 inch deep in the prepared soil. Space seeds about 12 inches apart if planting multiple seeds in one container.
4.4 Watering After Planting

Water the soil gently after planting to settle it around the seeds. Ensure the soil is moist but not waterlogged.
5. Care and Maintenance
Once your okra seeds are planted, proper care is critical for fostering healthy plants.
5.1 Watering
Okra requires consistent moisture, especially during dry spells. Water deeply once or twice a week, depending on weather conditions. Always check for soil moisture before watering; it should feel moist but not soggy.
5.2 Fertilizing
Fertilization boosts growth. Use a balanced fertilizer with an N-P-K ratio of 10-10-10 or similar. Apply the fertilizer every 4-6 weeks, following the manufacturer’s instructions.
5.3 Pruning and Supporting the Plants
While not strictly necessary, pruning can help manage growth and improve air circulation. If your plants become tall and leggy, consider staking them for support.
5.4 Pest Control
Okra is susceptible to pests like aphids, spider mites, and whiteflies. Regularly inspect your plants and treat infestations promptly with insecticidal soap or neem oil. Additionally, encouraging beneficial insects can help control pests naturally.
6. Harvesting Okra
Okra is ready to be harvested when the pods are about 3-4 inches long. It’s best to pick them when they’re young and tender — typically around 2-3 days after they form.

6.1 How to Harvest
Use garden shears or scissors to cut the pods from the plant. Take care to wear gloves, as the pods can be slightly prickly.
6.2 Post-Harvest Storage
Store harvested okra in a cool, dry place or refrigerate them in a perforated bag to maintain freshness.
7. Troubleshooting Common Issues
Even experienced gardeners face challenges. Here are some common issues and solutions:
- Yellowing Leaves: This may indicate overwatering or nutrient deficiency. Check soil moisture and consider fertilizing.
- Stunted Growth: A lack of sunlight or cramped root conditions can cause stunted growth. Ensure your plants receive adequate light and check container size.
- Pest Infestations: Regular monitoring can help detect issues early. Implement preventive measures, such as keeping the garden clean and using companion planting strategies.
8. FAQ
Q1: How many okra plants can I grow in one container?
You can grow one to two okra plants in a 5-gallon container, providing they have at least 12 inches of spacing.
Q2: Do okra plants need support?
In most cases, okra does not require support. However, taller varieties may benefit from staking if they become top-heavy.

Q3: Can I grow okra indoors?
Yes, okra can be grown indoors as long as it receives sufficient light (at least 6 hours of direct sunlight or supplemented artificial light).
Q4: What are the best companions for okra?
Companion plants like marigolds, basil, and peppers can deter pests and improve growth.
Q5: How long does it take for okra to produce pods?
Okra plants typically start producing pods about 50-60 days after planting.
Q6: Can I save seeds from my okra plants?
Yes, you can save seeds from mature, healthy pods. Let them dry on the plant before harvesting and store them in a cool, dry place.
Conclusion
Growing okra in containers is not only feasible but also highly rewarding. With the right preparation, care, and maintenance, you can enjoy a bountiful harvest of this nutritious vegetable. Whether you’re an inexperienced gardener or a seasoned enthusiast, following this guide will help you successfully cultivate okra, allowing you to share its unique flavor and health benefits with family and friends. Happy gardening!