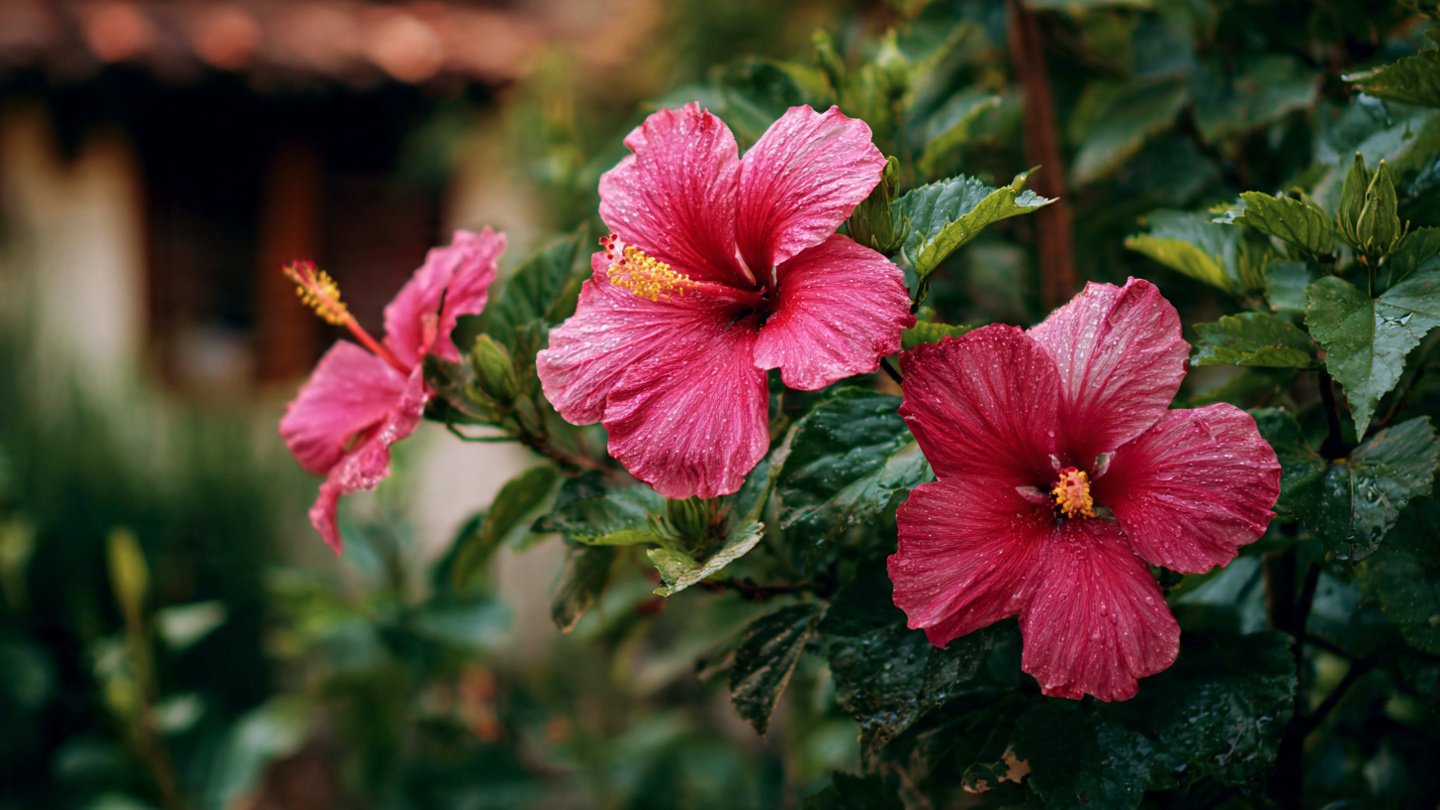
Hibiscus plants, with their vibrant blossoms and lush greenery, are a spectacular addition to any home garden. Renowned for their stunning flowers, which can be found in a variety of colors including red, pink, yellow, and white, hibiscus plants (genus Hibiscus) not only enhance the visual appeal of a landscape but also attract butterflies and hummingbirds. In this comprehensive guide, we will delve into essential techniques for growing healthy hibiscus plants, covering aspects from soil selection to pest management.
1. Understanding Hibiscus Varieties
Before you begin growing hibiscus, it’s essential to understand the different species available. The most common types are:
Latest Posts
- With Just 1 Bottle of Water How I Was Shocked by What Happened When Growing Vegetables
- Maximize Your Home Garden with the Hanging Pea Sprout Growing Model – Space-Saving, High-Yield, and Easy-to-Manage Vertical Gardening Solution
- Just Water – The Secret to Growing Plump, White Peanut Sprouts Right at Home: A Step-by-Step Guide for Beginners
- Growing Zucchini at Home in a Container: How to Cultivate Large, Long Fruits with a 1-to-72 Day Step-by-Step Diary for Maximum Yield
- Grow Long Beans on the Terrace in Used Recycling Baskets: The Ultimate Guide to Easy, Space-Saving, and High-Yield Terrace Gardening
- How to Grow Tons of Long Beans Easily Without a Garden – A Complete Guide to Growing Healthy Yardlong Beans Without Fertilizers or Pesticides
- Easy Long Bean Growing Trick – No Garden, No Fertilizer, No Pesticide
- Grow Bitter Melon in Bottles — Harvest So Big You Can’t Eat It All! The Ultimate Guide to Bottle Gardening for Maximum Yields
- Growing Garlic Made Easy: No Soil, Fast Results – The Ultimate Guide to Growing Fresh Garlic Indoors Without Traditional Soil
- Wall-Mounted Hydroponic Watermelon System: Grow Large, Juicy, and Delicious Watermelons at Home with Minimal Space and Maximum Yield
-
Tropical Hibiscus: These require warm temperatures and are typically grown as annuals in temperate climates.
-
Hardy Hibiscus: Often referred to as perennial hibiscus, these are more tolerant of cooler temperatures and can thrive in USDA zones 4-9.
-
Rose of Sharon (Hibiscus syriacus): A hardy deciduous shrub often used as a landscape plant.
Choosing the right variety based on your climate and personal preferences is crucial for successful cultivation.
2. Planting Hibiscus
A. Soil Preparation
Hibiscus plants prefer well-drained soil rich in organic matter. Here’s how to prepare the perfect soil:
-
Soil Type: An ideal mix consists of loamy soil with good drainage. Clay-heavy soil can be amended with compost or peat moss to enhance aeration.
-
pH Level: Aim for a soil pH between 6.0 and 6.8. You can test your soil using a pH kit available at garden centers and adjust using sulfur to lower the pH or lime to raise it.

-
Fertilization: Before planting, incorporate a balanced slow-release fertilizer into the soil. This will ensure the young plants have the nutrients they need for strong growth.
B. Planting Technique
Plant hibiscus in the spring after the danger of frost has passed.
-
Spacing: Space tropical hibiscus plants about 3 to 4 feet apart to allow for their expansive growth. Hardy varieties can be spaced closer together, about 2 to 3 feet apart.
-
Plant Depth: Dig a hole as deep as the root ball and twice as wide. Place the plant in the hole, backfill with soil, and water thoroughly.
-
Mulching: Apply a 2-3 inch layer of organic mulch around the base to retain moisture and suppress weeds. Avoid piling mulch against the stem.
3. Watering Needs
Hibiscus plants thrive with consistent watering, especially during the warmer months. Here are some key points:
-
Frequency: Water deeply once or twice a week, depending on rainfall and temperature. The soil should be moist but not waterlogged.
-
Signs of Underwatering: If the leaves start wilting or dropping, this may indicate that your plants need more water.
-
Signs of Overwatering: Yellowing leaves and root rot are signs of overwatering. Adjust your watering schedule promptly.

4. Lighting Requirements
Hibiscus plants prefer full sun, which means at least 6-8 hours of direct sunlight daily.
-
Location: Choose a location in your garden that receives ample sunlight. A south or southwest-facing garden area is ideal.
-
Indoor Hibiscus: If growing indoors, place them near a bright window. Consider using grow lights in low-light conditions.
5. Pest Management
Hibiscus plants can attract a variety of pests, including aphids, spider mites, and whiteflies. Here’s how to keep them under control:
A. Natural Remedies
-
Insecticidal Soap: Spray the plants with insecticidal soap to eliminate pests without harming beneficial insects.
-
Neem Oil: This natural pesticide is effective against a range of insects and can also act as a fungicide. Apply it regularly during pest season.
-
Introduce Beneficial Insects: Ladybugs and lacewings are natural predators of aphids, helping to keep their population in check.
B. Cultural Practices
-
Regularly inspect your plants for any signs of pests. Early intervention can prevent larger infestations.
-
Keep the area around your hibiscus free from debris where pests could hide.

6. Fertilizing Hibiscus
Regular feeding is essential for vibrant blooms:
-
Type of Fertilizer: Use a balanced fertilizer, preferably one with a higher phosphorus content (the middle number on the package) to encourage flowering.
-
Frequency: Fertilize every 4-6 weeks during the growing season (spring and summer) and reduce feeding in fall and winter.
7. Pruning and Maintenance
Pruning is critical to maintaining the shape and health of your hibiscus plants.
-
Timing: The best time to prune is late winter or early spring before the growing season begins.
-
How to Prune: Remove dead, damaged, or weak stems, cutting back to healthy wood. For tropical varieties, light pruning will encourage bushier growth. For hardy hibiscus, cut the stems back to about 12-18 inches above the ground.
8. Winter Care
For those in colder climates, it’s essential to protect hibiscus during the winter months:
-
Tropical Hibiscus: Bring them indoors before the first frost. Keep them in a well-lit area with cooler temperatures to mimic their natural environment.

-
Hardy Hibiscus: Mulch around the base to protect the roots. In colder zones, you might need to cover them with burlap or a frost cloth during extreme cold.
9. Common Issues and Troubleshooting
Despite your best efforts, hibiscus plants may encounter challenges. Here are some common issues and solutions:
A. Yellowing Leaves
This can be a sign of nutrient deficiency or overwatering. Assess your watering schedule and consider a balanced fertilizer application.
B. Leaf Drop
If your hibiscus is dropping leaves, it may be due to stress from environmental changes, such as moving indoors or fluctuating temperatures. Evaluate recent changes and stabilize conditions as needed.
C. Poor Blooming
If your hibiscus isn’t flowering, inadequate sunlight or a lack of nutrients could be to blame. Ensure they are receiving full sun and adjust your fertilizing routine.
FAQs
1. How long does it take for hibiscus plants to bloom?
Typically, hibiscus plants will start blooming in their first growing season, usually within 2-3 months of planting.
2. How often should I water my hibiscus?
Water hibiscus plants once or twice a week, ensuring the soil remains moist but not soggy.
3. Can hibiscus grow indoors?

Yes, hibiscus can be grown indoors, provided they receive enough light (ideally 6-8 hours of direct sunlight per day).
4. Do hibiscus plants need a lot of fertilizer?
While they do need regular feeding during the growing season, over-fertilizing can harm the plant. Stick to a balanced slow-release fertilizer every 4-6 weeks.
5. What pests are most common on hibiscus?
Common pests include aphids, spider mites, and whiteflies. Regular inspection and natural remedies like insecticidal soap can help manage them.
6. Can I prune my hibiscus at any time?
It’s best to prune hibiscus in late winter or early spring before the growing season begins to encourage new growth and blooming.
7. What should I do if my hibiscus isn’t blooming?
Ensure it receives adequate sunlight and nutrition. Consider adjusting the fertilizer regimen to include higher phosphorus to promote blooming.
8. How can I protect my hibiscus during the winter?
For tropical varieties, bring them indoors before frost. For hardy varieties, mulch around their base and protect them with burlap during extreme cold.
Conclusion
Growing hibiscus in your home garden can be a rewarding experience, turning your landscape into a tropical oasis with vibrant flowers and lush foliage. By following these ultimate techniques—from selecting the right variety to mastering care and maintenance—you can enjoy the beauty of hibiscus for many seasons to come. Whether you’re a novice gardener or a seasoned pro, implementing these strategies will surely lead to successful cultivation of these stunning plants. Happy gardening!