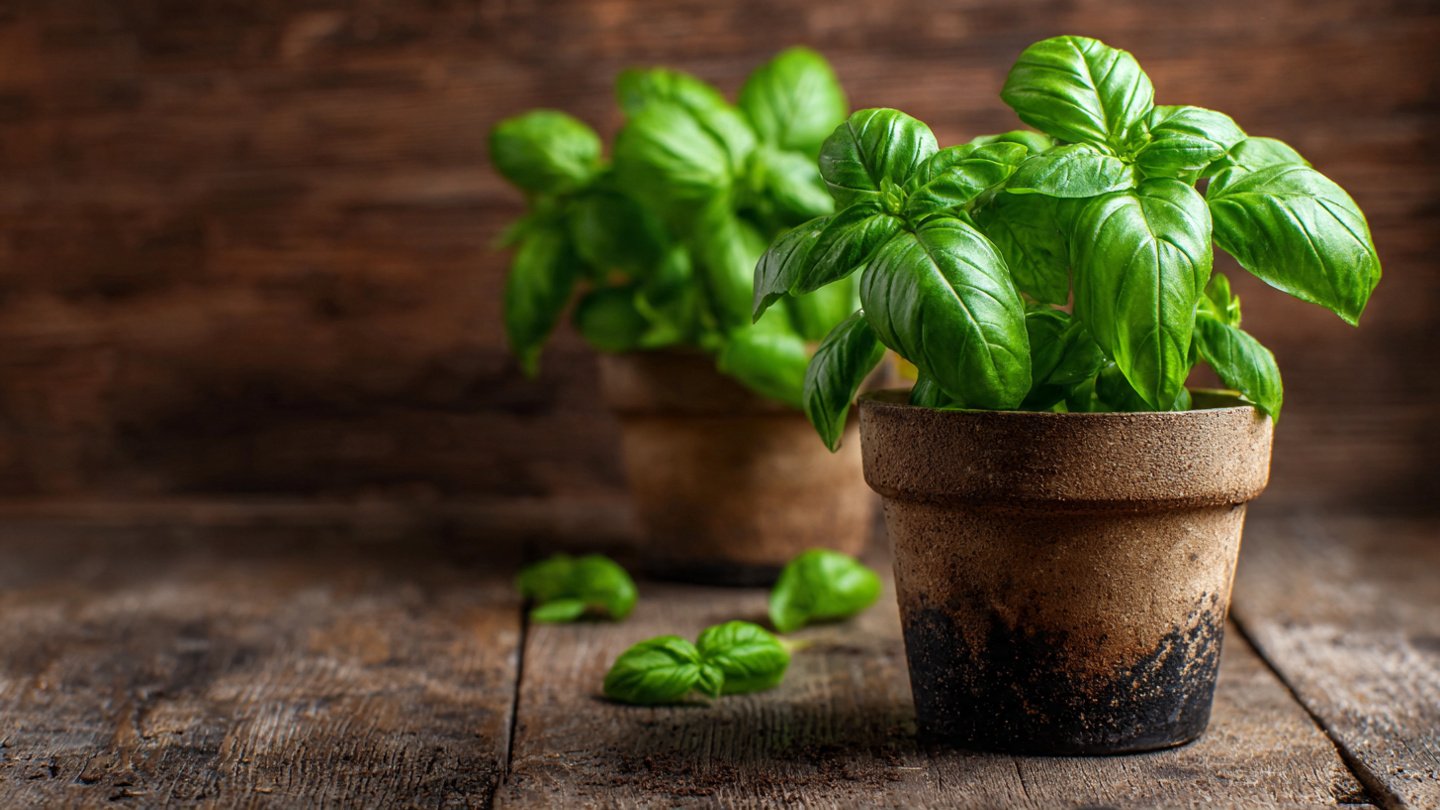
Basil is one of the most popular and versatile herbs in the culinary world. Revered for its aromatic flavor, basil can elevate a variety of dishes, from Italian pasta to Southeast Asian curries. If you’re a gardening enthusiast or just a home cook looking to add fresh basil to your kitchen, propagating basil is an essential skill. This guide will delve into the ins and outs of propagating basil, making it a suitable resource for both beginners and seasoned gardeners.
Why Propagate Basil?
Propagating basil allows you to:
Latest Posts
- With Just 1 Bottle of Water How I Was Shocked by What Happened When Growing Vegetables
- Maximize Your Home Garden with the Hanging Pea Sprout Growing Model – Space-Saving, High-Yield, and Easy-to-Manage Vertical Gardening Solution
- Just Water – The Secret to Growing Plump, White Peanut Sprouts Right at Home: A Step-by-Step Guide for Beginners
- Growing Zucchini at Home in a Container: How to Cultivate Large, Long Fruits with a 1-to-72 Day Step-by-Step Diary for Maximum Yield
- Grow Long Beans on the Terrace in Used Recycling Baskets: The Ultimate Guide to Easy, Space-Saving, and High-Yield Terrace Gardening
- How to Grow Tons of Long Beans Easily Without a Garden – A Complete Guide to Growing Healthy Yardlong Beans Without Fertilizers or Pesticides
- Easy Long Bean Growing Trick – No Garden, No Fertilizer, No Pesticide
- Grow Bitter Melon in Bottles — Harvest So Big You Can’t Eat It All! The Ultimate Guide to Bottle Gardening for Maximum Yields
- Growing Garlic Made Easy: No Soil, Fast Results – The Ultimate Guide to Growing Fresh Garlic Indoors Without Traditional Soil
- Wall-Mounted Hydroponic Watermelon System: Grow Large, Juicy, and Delicious Watermelons at Home with Minimal Space and Maximum Yield
- Save Money: Instead of buying new plants, you can create multiple plants from one.
- Ensure Freshness: Having basil on hand means you can harvest it fresh whenever you need.
- Explore Varietals: Propagation allows you to experiment with different basil varieties, such as Genovese, Thai, and Lemon basil.
Types of Basil
Before diving into propagation methods, it’s essential to understand the various basil types:
- Sweet Basil: The classic variety used in Italian dishes.
- Thai Basil: Has a distinct anise flavor, often used in Asian cooking.
- Lemon Basil: Offers a citrusy note, great for salads and tea.
- Purple Basil: Known for its unique color, this type has a milder flavor.
These types can all be propagated using similar methods, making it easy to diversify your herb garden.
Basic Requirements for Propagation
Regardless of your experience level, proper propagation begins with the right tools and environment.
Tools

- Sharp Scissors or Shears: Ensure clean cuts that promote faster rooting.
- Clean Containers: Use pots or jars free of contaminants.
- Potting Soil: A well-draining mix supports healthy growth.
- Water: Clean, preferably distilled water helps prevent root rot.
Environmental Conditions
- Light: Basil thrives in bright, indirect sunlight. Aim for 6-8 hours of light per day.
- Temperature: Optimal growth occurs between 70°F and 90°F (21°C to 32°C).
- Humidity: Basil enjoys a humid environment, which can be enhanced by misting or placing it near a water source.
Methods of Propagating Basil
There are three primary methods for propagating basil: water propagation, soil propagation, and seed propagation.
1. Water Propagation
Water propagation is the easiest and most visually satisfying method for beginners.
Steps:
-
Choose a Healthy Stem: Look for a healthy basil stem with several leaves. Aim for a stem that’s around 4 to 6 inches long.
-
Cut the Stem: Use sharp scissors to cut just below a leaf node (the bump where leaves grow). This increases the chance of root development.
-
Place in Water: Fill a glass or jar with water and place the cut end of the stem in it. Ensure no leaves are submerged, as this can lead to rot.

-
Find a Bright Spot: Place your jar in a location that receives indirect sunlight.
-
Change Water Regularly: Refresh the water every few days to keep it clean and oxygenated.
-
Wait for Roots to Develop: Within a week or two, you’ll notice roots forming. Allow them to grow about 2-3 inches long before transplanting them into soil.
2. Soil Propagation
For those who prefer a more traditional method, soil propagation is the way to go.
Steps:
-
Choose a Healthy Stem: Similar to water propagation, select a robust basil stem.
-
Cut and Prepare the Stem: Snip just below a leaf node, and remove the lower leaves to expose the stem.
-
Prepare the Potting Mix: Fill a small pot with well-draining potting soil.
-
Plant the Stem: Create a hole in the soil with a pencil or your finger, then insert the cutting into the hole. Firm the soil around the base to keep it upright.
-
Water Thoroughly: After planting, water the cutting lightly to settle the soil.
-
Cover (Optional): You can place a plastic bag or a clear plastic dome over the pot to increase humidity, but remember to ventilate it occasionally.

-
Bright Spot: Place the pot in a location with indirect sunlight.
-
Monitor Growth: In a few weeks, roots will develop. You can usually tell when the cutting is established when you see new growth.
3. Seed Propagation
Seed propagation is a rewarding method, though it requires more time and patience.
Steps:
-
Select Quality Seeds: Choose seeds from a reputable source to ensure good germination rates.
-
Prepare Seed-Starting Mix: Use a seed-starting mix that drains well.
-
Sow the Seeds: Sprinkle seeds on the soil’s surface, lightly pressing them in. Cover lightly with more soil.
-
Water Gently: Mist the surface to moisten without washing away the seeds.
-
Provide Optimal Conditions: Place the tray or pots in a warm area with indirect light. A heat mat can aid germination.
-
Thin the Seedlings: Once seedlings emerge and develop a few true leaves, thin them to ensure they have enough space to grow.
-
Transplant When Ready: Plant the seedlings in larger pots or directly in your garden after the last frost.

Maintenance After Propagation
Once your basil has rooted, maintaining it is crucial for a successful yield.
Watering
- Frequency: Water the plants when the top inch of soil feels dry. Avoid overwatering to prevent root rot.
Fertilizing
- Type of Fertilizer: Use a balanced, water-soluble fertilizer every four to six weeks to promote healthy growth.
Pruning
- Encourage Growth: Regularly pinch off the top leaves to encourage bushier growth. Always prune above a leaf node.
Pests and Diseases
- Common Pests: Watch for aphids, whiteflies, and spider mites. Neem oil can be effective for treatment.
- Disease Prevention: Avoid overcrowding plants and ensure good air circulation to prevent fungal diseases.
Harvesting The Benefits of Propagated Basil
Once your basil is established, it’s time to enjoy the fruits of your labor.
When to Harvest
- Timing: Harvest leaves once the plants are about 6 inches tall, typically within 4-6 weeks after propagation.
- Best Method: Use sharp scissors to clip individual leaves or the top parts of the stems, ensuring you don’t take more than a third of the plant at once.

Storing Basil
- Fresh Storage: Stored in a glass of water at room temperature, basil can stay fresh for several days.
- Freezing: They can be frozen for longer storage. Coarsely chop and store in ice cube trays with water or oil.
FAQs about Propagating Basil
1. Can basil be propagated year-round?
Yes, basil can be propagated indoors year-round, making it a great choice for a continuous supply.
2. How long does it take for basil cuttings to root?
Typically, basil cuttings will take about 1-2 weeks to develop roots in water or soil.
3. Can I propagate basil from store-bought basil?
Yes, as long as the basil stems are healthy and not treated with growth inhibitors, you can propagate them successfully.
4. What should I do if my basil plant becomes leggy?
Leggy plants usually result from a lack of light. Move your basil to a sunnier location and consider pruning the leggy stems to promote denser growth.
5. How do I know my basil is healthy?
Healthy basil will have vibrant green leaves, a strong aroma, and should be free from pests or discoloration.
By following the steps outlined in this comprehensive guide, you can successfully propagate basil and enjoy its flavors in your culinary creations. Whether you’re a beginner starting your first garden or an expert looking to expand your herb collection, propagating basil is a fulfilling and beneficial endeavor. Happy gardening!