Microgreens have taken the culinary world by storm, widely recognized for their vibrant flavors and impressive nutritional profiles. Whether you’re a seasoned gardener or a complete novice, growing microgreens at home is not only easy but also rewarding. This guide aims to provide you with everything you need to know about cultivating these tiny powerhouses in your own space.
What Are Microgreens?
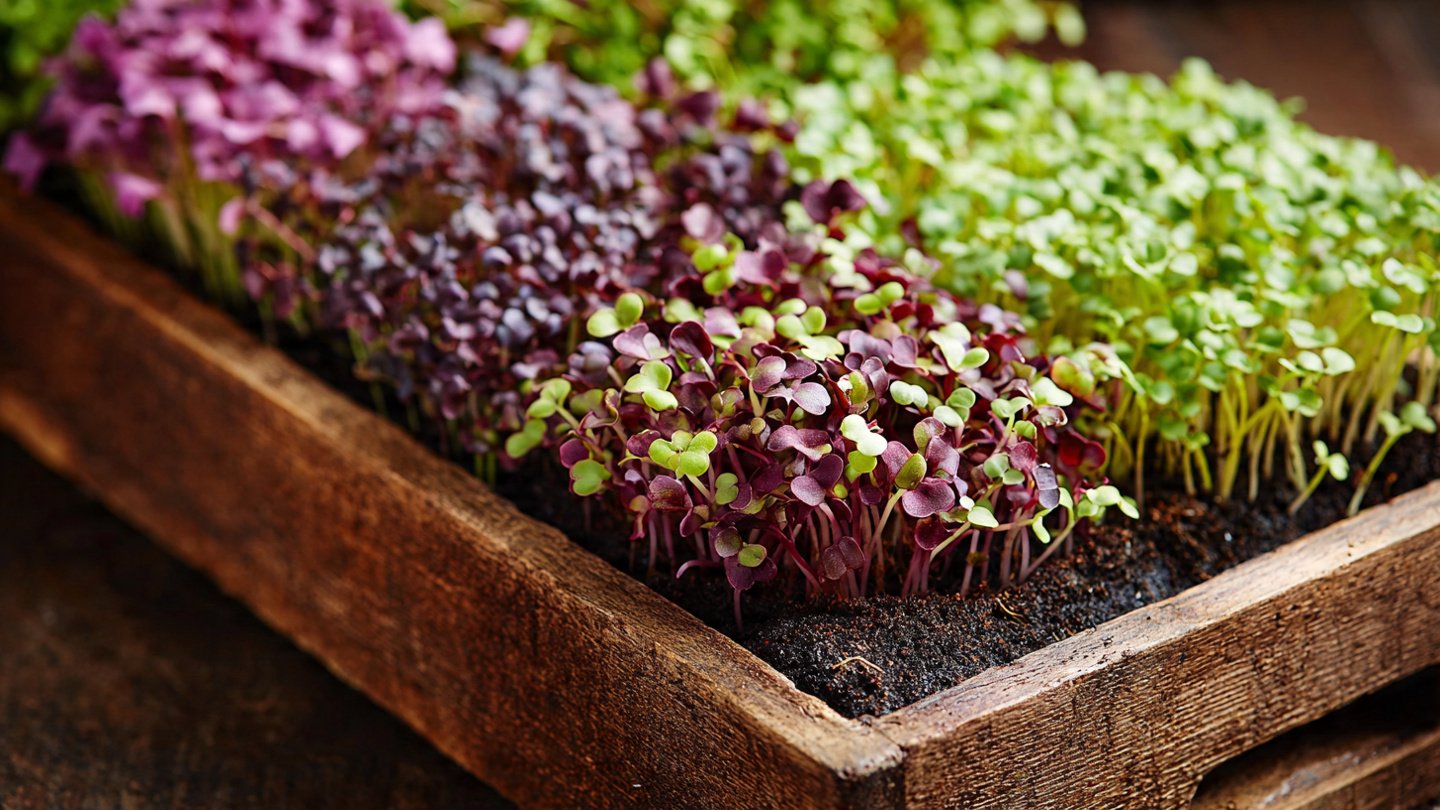
Microgreens are young, edible plants harvested at an early stage of growth, usually between 7 to 21 days after germination. Common varieties include arugula, basil, radish, and cilantro. These mini plants are celebrated for their concentrated flavors, vibrant colors, and high nutrient content, making them perfect for garnishing dishes, enhancing salads, or even adding a kick to sandwiches.
Latest Posts
- With Just 1 Bottle of Water How I Was Shocked by What Happened When Growing Vegetables
- Maximize Your Home Garden with the Hanging Pea Sprout Growing Model – Space-Saving, High-Yield, and Easy-to-Manage Vertical Gardening Solution
- Just Water – The Secret to Growing Plump, White Peanut Sprouts Right at Home: A Step-by-Step Guide for Beginners
- Growing Zucchini at Home in a Container: How to Cultivate Large, Long Fruits with a 1-to-72 Day Step-by-Step Diary for Maximum Yield
- Grow Long Beans on the Terrace in Used Recycling Baskets: The Ultimate Guide to Easy, Space-Saving, and High-Yield Terrace Gardening
- How to Grow Tons of Long Beans Easily Without a Garden – A Complete Guide to Growing Healthy Yardlong Beans Without Fertilizers or Pesticides
- Easy Long Bean Growing Trick – No Garden, No Fertilizer, No Pesticide
- Grow Bitter Melon in Bottles — Harvest So Big You Can’t Eat It All! The Ultimate Guide to Bottle Gardening for Maximum Yields
- Growing Garlic Made Easy: No Soil, Fast Results – The Ultimate Guide to Growing Fresh Garlic Indoors Without Traditional Soil
- Wall-Mounted Hydroponic Watermelon System: Grow Large, Juicy, and Delicious Watermelons at Home with Minimal Space and Maximum Yield
Benefits of Growing Microgreens at Home
-
Health Benefits: Microgreens contain higher nutrient levels than their mature counterparts. They are often rich in vitamins C, E, and K, as well as antioxidants.
-
Culinary Versatility: With a range of flavors and textures, microgreens can elevate any dish. They can be used in salads, smoothies, soups, and as garnishes for various meals.
-
Space Efficient: Microgreens require minimal space and can be grown in small areas such as windowsills, making them perfect for urban gardening.
-
Cost-Effective: Buying microgreens can be pricey. Growing your own reduces costs and ensures that you have a fresh supply on hand.
-
Quick Harvest: Many microgreens are ready to harvest in just 10-14 days, providing immediate satisfaction for your gardening efforts.

Essential Supplies for Growing Microgreens
To get started, you will need the following supplies:
-
Seeds: Look for organic seeds specifically meant for microgreens. Popular choices include mustard, radish, and sunflower.
-
Growing Medium: Options include potting soil, coconut coir, or specialized seed-starting mix. Avoid using dirt from your garden, as it may contain pests or diseases.
-
Containers: Shallow trays or containers with drainage holes are ideal. You can use repurposed plastic containers or specialized seed trays.
-
Light Source: Microgreens thrive best under bright, indirect sunlight or grow lights, especially if you are growing indoors.
-
Watering Tools: A spray bottle or a watering can with a fine nozzle works well for keeping your microgreens hydrated without overwatering.

Step-by-Step Guide to Growing Microgreens
1. Choosing Your Seeds
Select your favorite varieties of microgreens. Each has its unique flavor and growth characteristics. Check seed packets for recommendations on growing conditions.
2. Preparing Your Containers
Fill your chosen container with the growing medium, leveling it off gently. Make sure to leave about an inch of space at the top to prevent soil spilling when watering.
3. Sowing Seeds
Sprinkle the seeds evenly over the surface of the growing medium. Follow the recommended seed density on the packet; generally, you can sow quite densely since they will be harvested young.
4. Watering
Using a spray bottle, mist the seeds and the medium to moisten without saturating. Cover your container with a lid or plastic wrap to retain moisture and warmth, which helps with germination.
5. Providing Light
After the seeds have germinated (usually within 3-7 days), remove the cover and place the trays in a location with bright, indirect sunlight. If growing indoors without sufficient natural light, consider using LED grow lights positioned about 6 inches above the plants.

6. Maintenance
Keep the growing medium moist during the entire growth cycle. Check daily and mist or water as needed. Ensure proper air circulation, as this helps prevent mold growth.
7. Harvesting
Microgreens are typically ready to harvest when they are about 2-3 inches tall or when the first true leaves (cotyledons) have appeared. Use scissors to cut them just above the soil line. Rinse gently and enjoy!
8. Storage
Store harvested microgreens in a sealed container in the refrigerator. They are best consumed fresh but can last about a week when stored properly.
Common Mistakes to Avoid
-
Overwatering: This is one of the most common pitfalls. Ensure your medium is moist but not soggy to prevent root rot.
-
Lack of Light: Insufficient lighting can result in leggy, weak microgreens. Make sure they receive enough light to encourage healthy growth.
-
Using Old Seeds: Always check the expiration date on seed packets. Old seeds may have lower germination rates.

-
Ignoring Airflow: Poor airflow can lead to mold. Ensure your microgreens are spaced out or rotated frequently if you’re using multiple trays.
FAQs
1. How often should I water my microgreens?
Watering frequency depends on your environment. Generally, check daily and mist the surface if it feels dry. Be cautious not to oversaturate.
2. Can I grow microgreens without sunlight?
Yes! You can grow microgreens using LED grow lights. Ensure they are positioned about 6 inches above the plants for optimal growth.
3. What types of microgreens are best for beginners?
Some beginner-friendly microgreens include radish, arugula, and mustard greens. These varieties are easy to grow and germinate quickly.
4. When should I harvest my microgreens?
Most microgreens are ready for harvest 7-21 days after germination, once they reach about 2-3 inches in height and true leaves appear.

5. Can I reuse the soil after harvesting?
It is not recommended to reuse soil because it can contain diseases or pests from the previous crop. It’s best to start with fresh growing medium for each new batch.
6. Is it safe to consume microgreens?
Microgreens are safe to eat, provided they are grown in clean conditions. Always wash them thoroughly before consumption.
7. How long do microgreens last after harvest?
When stored in a sealed container in the fridge, microgreens can last about a week. However, they are best enjoyed fresh.
Conclusion
Growing microgreens at home is an enjoyable and fulfilling endeavor that offers instant rewards in flavor, health, and aesthetic appeal. Whether you want to enhance your culinary creations or simply connect more closely with the food you eat, this sustainable practice is a fantastic addition to your gardening repertoire. With this guide, you’re now equipped to cultivate your own microgreen garden, bringing freshness and vitality to your table. Happy growing!