Bean sprouts are a versatile, nutrient-packed addition to any meal. From stir-fries and salads to wraps and soups, their crisp texture and mild flavor make them a favorite worldwide. But what if you could enjoy fresh, homegrown bean sprouts without trips to the store? That’s where discovering a new way to grow bean sprouts at home is both quick and practical. With minimal equipment, simple steps, and a little daily care, you can have sprouts ready in just 3–5 days.
This guide explores modern methods for home sprouting, safety considerations, and expert tips to help beginners get started confidently.
Why Grow Bean Sprouts at Home?
Growing bean sprouts at home has many advantages:
- Fresh and Nutrient-Rich: Homegrown sprouts often retain more vitamins and enzymes than store-bought options.
- Quick Yield: Most sprouts are ready to eat within days, providing almost instant gratification for home gardeners.
- Cost-Effective: A small amount of seeds yields multiple servings over several days.
- Compact and Space-Saving: Perfect for urban apartments, kitchen counters, or balconies.
- Sustainable and Clean: You control the water and hygiene, avoiding preservatives or chemicals commonly used in commercial sprouts.
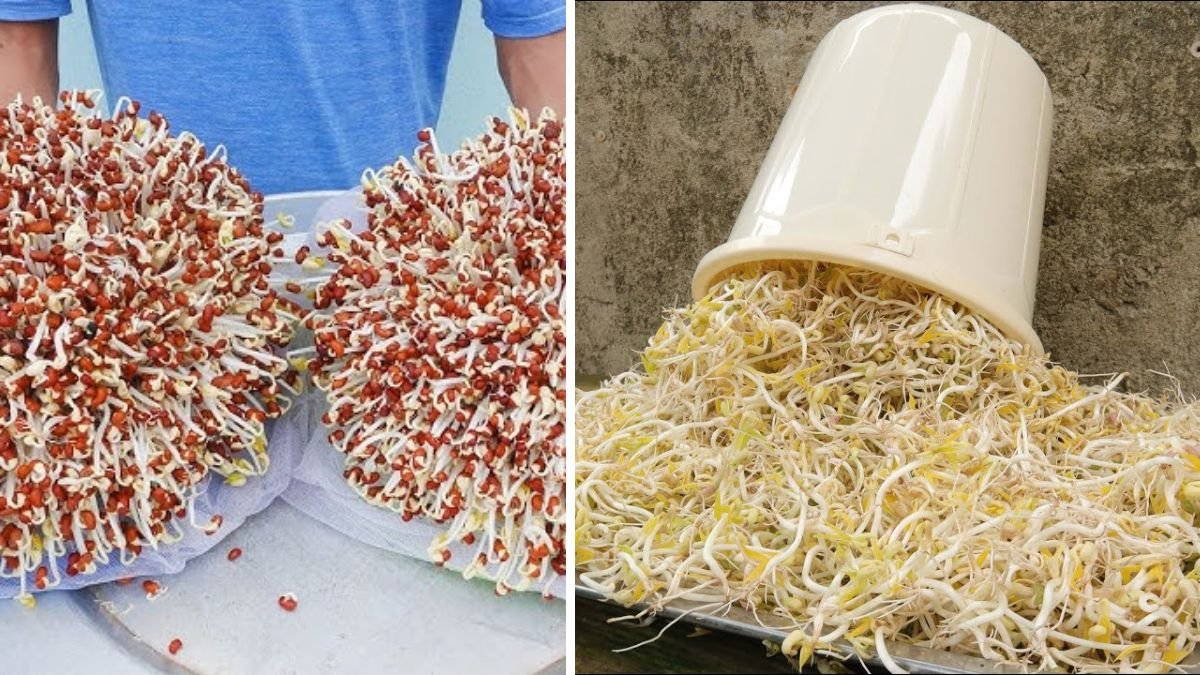
Mung bean sprouts are the most popular choice for home cultivation due to their fast germination and tender, crunchy shoots. (plantura.garden)

Traditional vs. Modern DIY Methods
Traditionally, sprouts are grown in jars or trays that require frequent rinsing and draining. While effective, this method can be cumbersome for beginners.
Latest Posts
- With Just 1 Bottle of Water How I Was Shocked by What Happened When Growing Vegetables
- Maximize Your Home Garden with the Hanging Pea Sprout Growing Model – Space-Saving, High-Yield, and Easy-to-Manage Vertical Gardening Solution
- Just Water – The Secret to Growing Plump, White Peanut Sprouts Right at Home: A Step-by-Step Guide for Beginners
- Growing Zucchini at Home in a Container: How to Cultivate Large, Long Fruits with a 1-to-72 Day Step-by-Step Diary for Maximum Yield
- Grow Long Beans on the Terrace in Used Recycling Baskets: The Ultimate Guide to Easy, Space-Saving, and High-Yield Terrace Gardening
- How to Grow Tons of Long Beans Easily Without a Garden – A Complete Guide to Growing Healthy Yardlong Beans Without Fertilizers or Pesticides
- Easy Long Bean Growing Trick – No Garden, No Fertilizer, No Pesticide
- Grow Bitter Melon in Bottles — Harvest So Big You Can’t Eat It All! The Ultimate Guide to Bottle Gardening for Maximum Yields
- Growing Garlic Made Easy: No Soil, Fast Results – The Ultimate Guide to Growing Fresh Garlic Indoors Without Traditional Soil
- Wall-Mounted Hydroponic Watermelon System: Grow Large, Juicy, and Delicious Watermelons at Home with Minimal Space and Maximum Yield
Recent innovations make sprouting even easier. For instance, the paper towel method requires only seeds, a shallow tray, and damp paper towels. This approach reduces daily maintenance, ensures even moisture distribution, and prevents mold. (biologyinsights.com)
Similarly, updated sprouting trays with built-in drainage simplify the process further, making fresh sprouts accessible to anyone — even without prior gardening experience. (harrisseeds.com)
Essential Supplies
You only need a few items to start growing bean sprouts at home:

- Sprouting Seeds: Mung beans or lentils are ideal. Choose seeds labeled for sprouting to reduce contamination risks.
- Container: A jar, tray, or shallow box works for most methods.
- Cover: Cheesecloth, mesh, or a paper towel keeps seeds moist while allowing airflow.
- Water: Clean, preferably filtered water for soaking and rinsing.
- Spray Bottle: Optional, for misting the sprouts.
Step-by-Step Guide: Quick Bean Sprouts at Home
Step 1: Soak Your Seeds
Begin by soaking 2–3 tablespoons of mung beans in cool, clean water for 8–12 hours. Overnight soaking kickstarts germination and softens the seed coat. (harrisseeds.com)
Step 2: Prepare the Sprouting Surface
Paper-Towel Method: Line a shallow tray with a damp paper towel. Spread soaked beans evenly on the towel and cover with another damp towel to maintain humidity.
Jar Method: Place the beans in a jar covered with cheesecloth or a mesh lid. Tilt the jar to drain water after rinsing. (biologyinsights.com)

Step 3: Maintain Moisture
Keep the seeds consistently moist without waterlogging. Mist them twice daily if using the paper-towel method, or rinse and drain 2–3 times daily in a jar. (harrisseeds.com)
Step 4: Ensure Proper Temperature and Darkness
Sprouts germinate best at room temperature (18–29°C) in a dark or dimly lit space. A cupboard, pantry, or countertop away from direct sunlight is ideal. (theseedcollection.com.au)
Step 5: Harvest in 3–5 Days
When sprouts reach 1–2 inches long, they’re ready to eat. Rinse thoroughly before consumption and store in the refrigerator for up to 3 days. (harrisseeds.com)
Safety Tips for Homegrown Sprouts
Sprouts are prone to bacterial contamination, so hygiene is crucial:

- Wash hands, trays, and jars thoroughly before starting.
- Use clean, filtered water for soaking and rinsing.
- Consider lightly cooking sprouts for vulnerable groups (children, elderly, pregnant women).
- Refrigerate harvested sprouts and consume within a few days. (realsimple.com)
Choosing seeds labeled for sprouting reduces the risk of Salmonella and E. coli.
Tips for Optimal Sprouting
- Dark Growth: Sprouting in a dark space results in sweeter, more tender shoots. (theseedcollection.com.au)
- Avoid Overcrowding: Spread seeds evenly to prevent mold and ensure proper air circulation.
- Staggered Batches: Start new batches every day or two for a continuous supply of fresh sprouts.
- Use a Sprouting Lid: In jars, a mesh lid simplifies rinsing and drainage. (harrisseeds.com)
Culinary Uses for Bean Sprouts
Homegrown sprouts are versatile:
- Stir-fries and fried rice
- Fresh salads and wraps
- Sandwich and burger toppings
- Soups and ramen bowls
- Lightly cooked smoothies or green bowls
Because they grow rapidly, you can enjoy fresh sprouts multiple times a week, enhancing both nutrition and flavor in meals. (recipes.timesofindia.com)
Authoritative Sources
- Harris Seeds – How to Grow Sprouts at Home: Jar and tray methods, beginner-friendly. (harrisseeds.com)
- Plantura – Mung Bean Sprouts: Nutritional benefits and DIY growing tips. (plantura.garden)
- Almanac – Sprouts in a Jar: Step-by-step instructions for beginners. (almanac.com)
- Times of India – Home Sprouting: Practical and cultural overview of sprouts. (recipes.timesofindia.com)
Conclusion
Discovering a new way to grow bean sprouts at home that is both quick and easy empowers anyone to enjoy fresh, nutritious greens without leaving their kitchen. With simple tools, proper hygiene, and consistent care, you can harvest sprouts in just 3–5 days.

Whether using the paper-towel method or a traditional jar setup, homegrown bean sprouts provide unmatched freshness, flavor, and nutritional benefits. Start small, experiment with different seed types, and enjoy the satisfaction of growing your own food — all in just a few days.
Fresh, crunchy, and full of vitamins — growing bean sprouts at home is a simple, rewarding, and healthy habit that anyone can master.