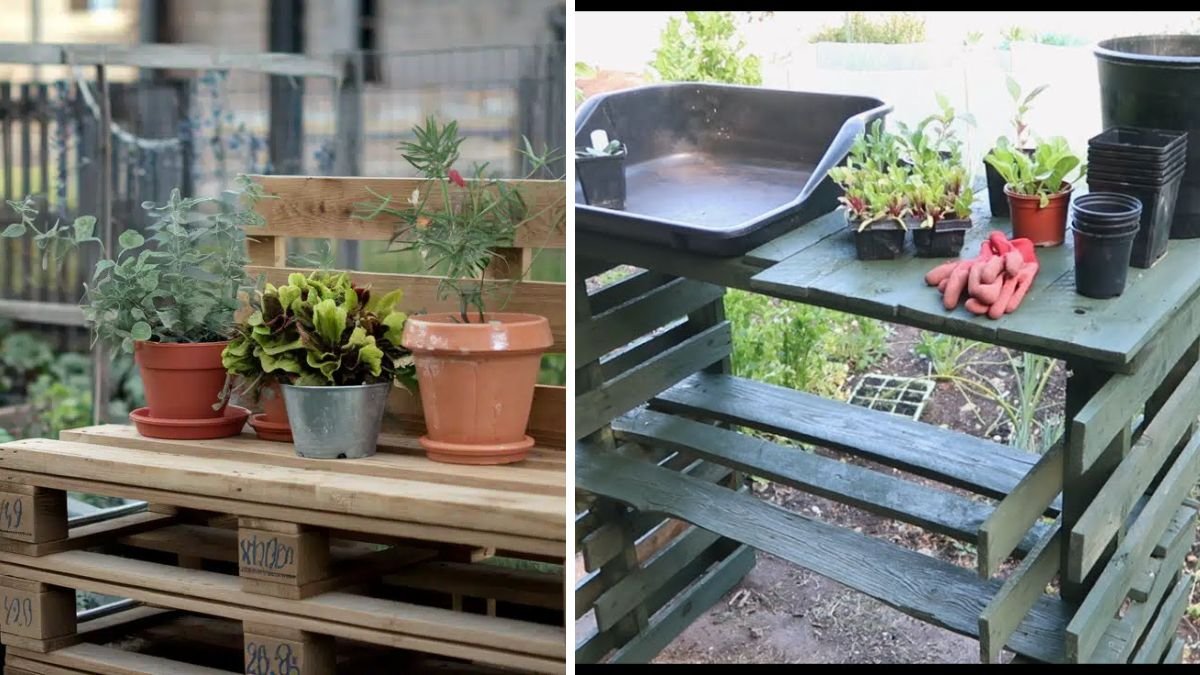
A potting bench is one of the most useful features a gardener can have—but store-bought versions can be expensive and lack character. Fortunately, old wooden pallets offer an affordable, sustainable, and stylish solution. With a little creativity, pallets can be transformed into a functional potting bench that enhances both your workflow and your garden’s aesthetic.
This guide walks you through planning, building, and styling a potting bench using reclaimed pallets.
Why Use Wooden Pallets?
Pallets are ideal for DIY projects because they are:
- Inexpensive or free
- Made from solid wood
- Durable and weather-resistant
- Easy to customize
Reusing pallets also keeps usable materials out of landfills.

Choosing Safe Pallets
Not all pallets are garden-safe.
Latest Posts
- With Just 1 Bottle of Water How I Was Shocked by What Happened When Growing Vegetables
- Maximize Your Home Garden with the Hanging Pea Sprout Growing Model – Space-Saving, High-Yield, and Easy-to-Manage Vertical Gardening Solution
- Just Water – The Secret to Growing Plump, White Peanut Sprouts Right at Home: A Step-by-Step Guide for Beginners
- Growing Zucchini at Home in a Container: How to Cultivate Large, Long Fruits with a 1-to-72 Day Step-by-Step Diary for Maximum Yield
- Grow Long Beans on the Terrace in Used Recycling Baskets: The Ultimate Guide to Easy, Space-Saving, and High-Yield Terrace Gardening
- How to Grow Tons of Long Beans Easily Without a Garden – A Complete Guide to Growing Healthy Yardlong Beans Without Fertilizers or Pesticides
- Easy Long Bean Growing Trick – No Garden, No Fertilizer, No Pesticide
- Grow Bitter Melon in Bottles — Harvest So Big You Can’t Eat It All! The Ultimate Guide to Bottle Gardening for Maximum Yields
- Growing Garlic Made Easy: No Soil, Fast Results – The Ultimate Guide to Growing Fresh Garlic Indoors Without Traditional Soil
- Wall-Mounted Hydroponic Watermelon System: Grow Large, Juicy, and Delicious Watermelons at Home with Minimal Space and Maximum Yield
Look for These Markings
- HT (Heat Treated): Safe for use
- Avoid MB (Methyl Bromide): Toxic
Choose clean pallets with no chemical spills or strong odors.
Planning Your Potting Bench
Before building, consider:
- Available space
- Bench height (comfortable waist level)
- Storage needs
- Indoor or outdoor placement
A basic potting bench includes:

- Work surface
- Lower shelf
- Optional backboard or hooks
Tools and Materials Needed
Basic tools:
- Hammer or drill
- Screws or nails
- Saw
- Sandpaper
Materials:
- 2–3 wooden pallets
- Exterior wood screws
- Optional stain or sealant
Preparing the Pallets
- Remove loose or broken boards
- Sand all surfaces thoroughly
- Trim boards to size if needed
Sanding prevents splinters and improves appearance.
Building the Potting Bench Frame
Step 1: Create the Base
- Use one pallet as the bottom shelf
- Attach legs made from pallet wood
- Ensure level and stability
Step 2: Add the Work Surface
- Secure a second pallet or planks on top
- Leave small gaps for drainage
Step 3: Reinforce the Structure
- Add cross supports for strength
- Tighten all joints
Adding Storage and Features
Enhance functionality with:

- Hooks for tools
- Shelves for pots
- Side bins for soil
- Backboard for hanging items
Customization makes the bench uniquely yours.
Weatherproofing Your Bench
For outdoor use:
- Apply exterior wood sealant
- Use natural oils or eco-friendly stains
- Reapply annually
Weatherproofing extends lifespan significantly.
Styling Your Potting Bench
Style ideas:

- Rustic farmhouse look
- Minimalist natural wood
- Painted bench with neutral tones
- Vintage metal accents
Add plants, jars, and baskets for personality.
Where to Place Your Potting Bench
Ideal locations:
- Near garden beds
- On a patio or balcony
- Inside a greenhouse
- Against a fence or wall
Shade improves comfort during summer use.
Benefits of a DIY Pallet Potting Bench
- Saves money
- Reduces waste
- Fully customizable
- Adds charm to your garden
- Encourages organized gardening
It becomes both a workspace and a focal point.

Maintenance Tips
- Clean soil regularly
- Check screws annually
- Reseal wood as needed
Proper care keeps your bench functional for years.
Final Thoughts
Turning old wooden pallets into a stylish potting bench proves that great garden tools don’t have to be expensive or wasteful. With basic tools and imagination, you can create a beautiful, practical workspace that reflects your gardening style while promoting sustainability. Every time you pot a plant or organize tools, you’ll appreciate the craftsmanship—and the story—behind your bench.