Potatoes are one of the world’s most widely grown and consumed vegetables. Whether cultivated in a backyard garden, raised bed, or farm plot, potatoes provide a versatile and nutritious food source. For gardeners and growers, increasing the number of tubers per plant is often a top goal. This guide will show you how to make potatoes for lots of tubers using simple, proven techniques.
Why Yield Matters
Increasing potato yield is not just about quantity — it directly affects food security, nutrition, and overall productivity. Recent reports from India’s Punjab region highlight record potato production, achieved by using quality seed tubers and improved cultivation practices. These methods allow both commercial farmers and home gardeners to produce more tubers per plant, maximizing efficiency in any growing space. (FreshPlaza)
Understanding potato biology is essential. Potatoes grow from seed tubers, which are small sections of potato with “eyes.” Each eye can sprout a stem that develops into shoots and roots. Underground stolons form along these stems, eventually swelling into the tubers we harvest. (University of Minnesota Extension)
Step 1: Choose High-Quality Seed Tubers
The foundation of a high-yield potato crop begins with disease-free seed tubers. Unlike grocery store potatoes, certified seed tubers are specifically grown for planting and are guaranteed to be healthy and vigorous.

Select tubers with multiple eyes, as each eye can sprout a stem. More stems typically result in more stolons and a higher tuber count. Heirloom varieties or region-specific cultivars often provide better flavor and consistent yields.
Latest Posts
- With Just 1 Bottle of Water How I Was Shocked by What Happened When Growing Vegetables
- Maximize Your Home Garden with the Hanging Pea Sprout Growing Model – Space-Saving, High-Yield, and Easy-to-Manage Vertical Gardening Solution
- Just Water – The Secret to Growing Plump, White Peanut Sprouts Right at Home: A Step-by-Step Guide for Beginners
- Growing Zucchini at Home in a Container: How to Cultivate Large, Long Fruits with a 1-to-72 Day Step-by-Step Diary for Maximum Yield
- Grow Long Beans on the Terrace in Used Recycling Baskets: The Ultimate Guide to Easy, Space-Saving, and High-Yield Terrace Gardening
- How to Grow Tons of Long Beans Easily Without a Garden – A Complete Guide to Growing Healthy Yardlong Beans Without Fertilizers or Pesticides
- Easy Long Bean Growing Trick – No Garden, No Fertilizer, No Pesticide
- Grow Bitter Melon in Bottles — Harvest So Big You Can’t Eat It All! The Ultimate Guide to Bottle Gardening for Maximum Yields
- Growing Garlic Made Easy: No Soil, Fast Results – The Ultimate Guide to Growing Fresh Garlic Indoors Without Traditional Soil
- Wall-Mounted Hydroponic Watermelon System: Grow Large, Juicy, and Delicious Watermelons at Home with Minimal Space and Maximum Yield
Step 2: Prepare Your Soil
Potatoes grow best in loose, well-drained soil with a slightly acidic pH of 6.0–6.5. Proper soil preparation ensures tubers have room to expand and develop properly.
- Loosen soil at least 10–12 inches deep to allow stolons to grow.
- Add compost or well-rotted organic matter to enhance fertility and structure.
- Remove stones and debris to prevent misshaped tubers.
Raised beds or containers are also effective, particularly in small gardens. The key is to provide enough loose soil for tubers to grow freely.
Step 3: Planting Techniques
Plant seed tubers 12–15 inches apart with the eyes facing upward. Planting depth should be about 3–4 inches. Avoid planting too deep or too shallow, as incorrect depth can hinder sprouting.

Mixing small tubers with fine sand before planting can help distribute them evenly and prevent overcrowding. Overcrowded plants produce fewer, smaller tubers. Consistent watering after planting is crucial to support sprouting.
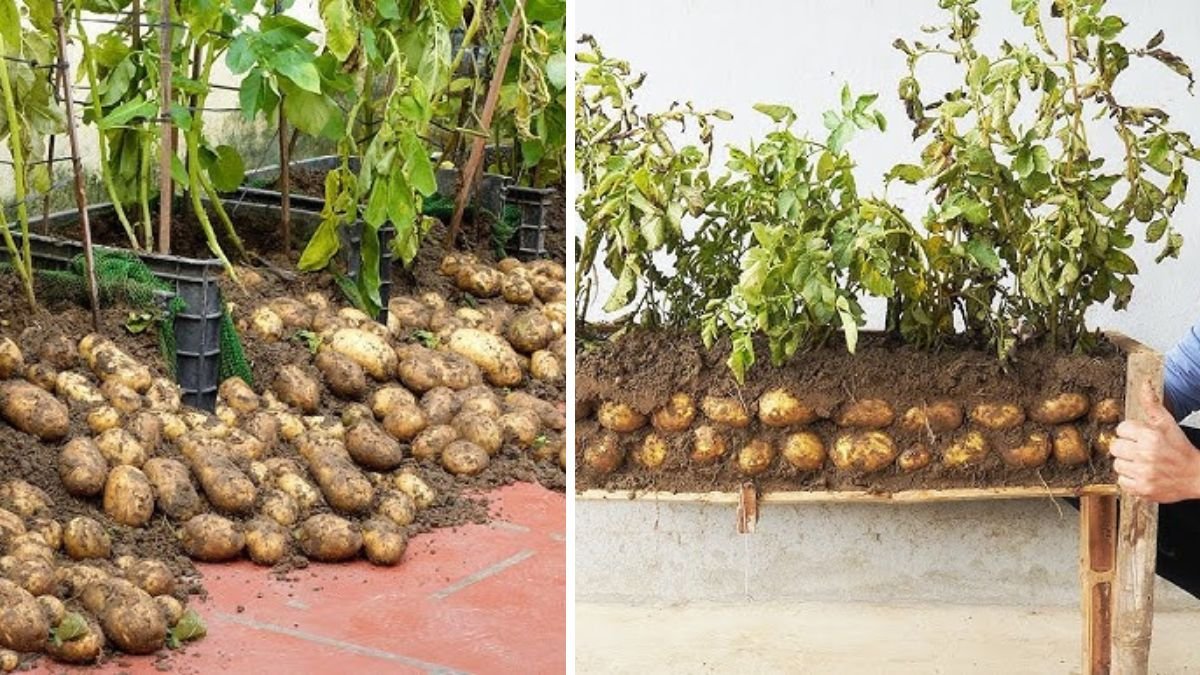
Step 4: Hilling to Boost Tuber Production
“Hilling” or mounding soil around potato stems is a key practice for increasing tuber numbers. Hilling:
- Protects developing tubers from sunlight, preventing greening.
- Encourages stolons to form higher on the stem.
- Provides more space for tuber formation.
Start hilling when shoots reach 6–8 inches tall, and repeat as the plant grows. Proper hilling can significantly increase both the number and size of tubers.
Step 5: Fertilization for Maximum Tubers
Balanced nutrition is essential for stimulating tuber formation. While nitrogen promotes leafy growth, phosphorus, potassium, and calcium directly support tuber initiation and development.

- Phosphorus: Encourages strong tuber set.
- Potassium: Strengthens tuber quality and overall plant health.
- Calcium: Improves cell stability and root development.
Soil testing can help you adjust fertilization to your garden’s specific needs, ensuring plants develop multiple healthy tubers. (Yara Ireland)
Step 6: Sunlight and Water Management
Potatoes require full sunlight for 6–8 hours daily. Light stimulates photosynthesis, which provides the energy necessary for tuber development.
Moisture consistency is vital, particularly during tuber initiation. Water stress at this stage can reduce the number of tubers and result in hollow or misshapen potatoes. Avoid overwatering, as waterlogged soil can lead to rot and disease. Mulching helps retain moisture and control weeds.
Step 7: Thinning and Spacing
Though less critical than in carrots, maintaining proper spacing between potato plants ensures each tuber has enough nutrients and room to develop. Closer spacing produces more small tubers, while wider spacing favors fewer, larger tubers. Adjust spacing based on whether you prefer quantity or size.

Harvesting Your Potatoes
Potatoes are ready to harvest when plants die back naturally or approximately 2–3 months after planting. Carefully dig tubers using a garden fork to avoid bruising.
- Baby potatoes can be harvested early for tender, smaller tubers.
- Allow skins to “set” by leaving tubers in soil for a few days after tops die back.
- Store harvested potatoes in a cool, dark, humid place to extend shelf life.
Proper handling ensures potatoes remain clean, healthy, and free from damage.
Pro Tips for Maximizing Tuber Count
- Succession planting: Stagger planting dates to extend harvest and maintain a constant supply.
- Crop rotation: Avoid planting potatoes in the same soil each year to reduce disease and nutrient depletion.
- Pest management: Protect against carrot flies, nematodes, and other pests that can reduce tuber numbers.
- Monitor nutrients: Avoid excessive nitrogen, which encourages leafy growth at the expense of tubers.
Container Growing
Even small spaces can yield high potato numbers. Use deep containers (at least 12 inches) filled with loose, fertile soil. Shorter varieties are ideal for containers. Ensure adequate sunlight, regular water, and proper hilling. Container potatoes are perfect for balconies or indoor gardening setups.
Recent Trends in Potato Cultivation
Potato production continues to grow globally, aided by innovations in seed quality, precision farming, and soil management. Modern methods allow growers to produce more tubers per plant, even in smaller spaces. Research also shows that monitoring plant growth and tuber development using technology can optimize yields. (Potato News Today)

Authoritative Sources
- University of Minnesota Extension – Growing Potatoes
- White Flower Farm – Potato Growing Guide
- Yara Ireland – Potato Tuber Numbers
- FreshPlaza – Punjab Potato Production
Conclusion
If you’re surprised at how simple it is to produce lots of potato tubers, you’re not alone. By focusing on high-quality seed tubers, proper soil preparation, balanced nutrition, sunlight, and hilling, you can significantly boost your potato harvest.
Whether you’re a backyard gardener or a small-scale grower, these practical strategies will help you make potatoes for lots of tubers with ease and satisfaction. With patience and consistent care, you can enjoy a bountiful, clean potato harvest every season