In an age where sustainability is more crucial than ever, the idea of transforming kitchen scraps into nutrient-rich compost not only reduces waste but also enriches your garden. The composting process can seem daunting, but with a few simple steps, you can create high-quality compost in just 10 days. This guide will walk you through the essentials of indoor and outdoor composting, and provide tips for ensuring you achieve composting success.
The Benefits of Composting
Before we dive into the how-to, let’s explore why composting is a worthy endeavor:
Latest Posts
- With Just 1 Bottle of Water How I Was Shocked by What Happened When Growing Vegetables
- Maximize Your Home Garden with the Hanging Pea Sprout Growing Model – Space-Saving, High-Yield, and Easy-to-Manage Vertical Gardening Solution
- Just Water – The Secret to Growing Plump, White Peanut Sprouts Right at Home: A Step-by-Step Guide for Beginners
- Growing Zucchini at Home in a Container: How to Cultivate Large, Long Fruits with a 1-to-72 Day Step-by-Step Diary for Maximum Yield
- Grow Long Beans on the Terrace in Used Recycling Baskets: The Ultimate Guide to Easy, Space-Saving, and High-Yield Terrace Gardening
- How to Grow Tons of Long Beans Easily Without a Garden – A Complete Guide to Growing Healthy Yardlong Beans Without Fertilizers or Pesticides
- Easy Long Bean Growing Trick – No Garden, No Fertilizer, No Pesticide
- Grow Bitter Melon in Bottles — Harvest So Big You Can’t Eat It All! The Ultimate Guide to Bottle Gardening for Maximum Yields
- Growing Garlic Made Easy: No Soil, Fast Results – The Ultimate Guide to Growing Fresh Garlic Indoors Without Traditional Soil
- Wall-Mounted Hydroponic Watermelon System: Grow Large, Juicy, and Delicious Watermelons at Home with Minimal Space and Maximum Yield
-
Waste Reduction: In the United States, approximately 30-40% of the food supply ends up in landfills. Composting kitchen scraps diverts waste from landfills and reduces methane emissions.
-
Nutrient-Rich Fertilizer: Compost improves soil health by adding essential nutrients, beneficial microorganisms, and organic matter.
-
Water Conservation: Compost helps soil retain moisture, reducing the need for watering and promoting healthier plants.
-
Cost-Effective: Instead of purchasing chemical fertilizers, your homemade compost can serve as a free and natural alternative.
Now that you understand the benefits, let’s get started on how to successfully compost kitchen scraps in just 10 days!
Step-by-Step Guide to Quick Composting
1. Gather Your Materials

To create compost in just 10 days, you’ll need to gather materials that create a balanced environment for decomposition:
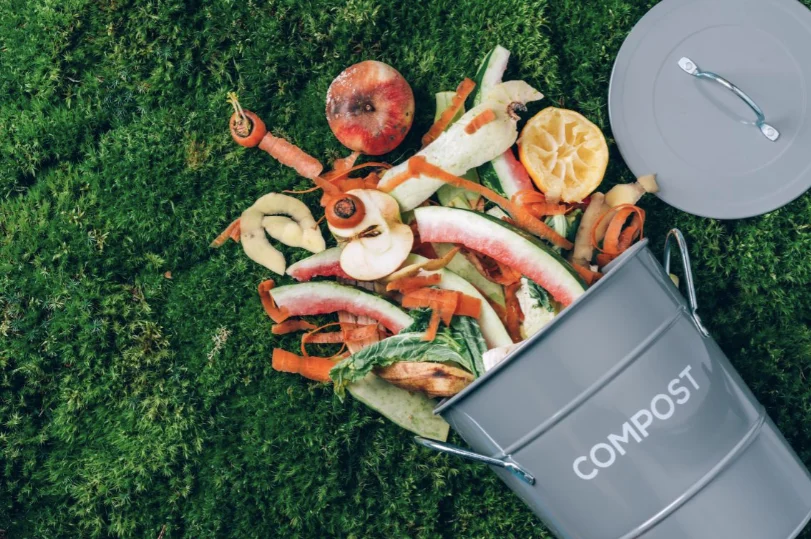
Kitchen Scraps
- Vegetable and fruit peels, cores, and scraps
- Coffee grounds and filters
- Eggshells
- Grains (ensure no mold is present)
Yard Waste
- Grass clippings
- Leaves (avoid too many dry, woody materials)
- Small branches (no larger than 3 inches)
2. Balance Your Brown and Green Materials
Composting relies on a balance of “green” materials (nitrogen-rich) and “brown” materials (carbon-rich). The ideal ratio is approximately 2:1 green to brown.
Green Materials:
- Kitchen scraps
- Fresh grass clippings
- Coffee grounds

Brown Materials:
- Dried leaves
- Cardboard (shredded)
- Straw
3. Choose a Composting Method
There are several methods to compost quickly:
Hot Composting
Hot composting involves turning your compost pile regularly to aerate it, promoting faster decomposition. Here’s how to do it:
-
Create a Pile or Use a Bin: Stack your materials in a pile or compost bin, aiming for a size of at least 3 feet by 3 feet.
-
Layer Your Materials: Start with a layer of brown material, followed by green materials. Repeat until you reach about 3 feet in height.

-
Moisten the Pile: Add water as you build the pile; it should be damp but not soggy.
-
Turn the Pile: Using a pitchfork or shovel, turn the pile every 2-3 days to introduce oxygen, which accelerates the decomposition process.
-
Monitor Temperature: A well-balanced compost pile will heat up to around 130-160°F. If it cools, turning or adding more green materials can help reintroduce heat.
Vermicomposting
For those with limited outdoor space, vermicomposting is an excellent indoor option. Instead of traditional compost, you’ll use red wiggler worms to break down kitchen scraps.
-
Get a Worm Bin: Purchase or create a bin with drainage holes.
-
Add Bedding: Shred newspaper or cardboard for bedding and moisten it lightly.
-
Add Worms and Scraps: Introduce red wigglers and then add your kitchen scraps buried within the bedding.
-
Maintain the Bin: Keep the bin in a dark, cool place and monitor moisture. The worms will do the work, creating nutrient-rich “worm castings” over a few weeks.

4. Check for Readiness
In about 7-10 days, after consistent turning and monitoring, your compost should be dark, crumbly, and have an earthy smell. If you still see recognizable scraps, it might need a few more days.
5. Use Your Compost
Once ready, you can introduce your compost to your garden soil, potting mixes, or flower beds. Mix it with existing soil to enhance nutrients, improve soil structure, and boost plant growth.
Tips for Successful Composting
- Chop Materials: Breaking down larger scraps into smaller pieces accelerates decomposition.
- Avoid Meat and Dairy: These attract pests and can introduce pathogens.
- Experiment with Proportions: Adjust the green and brown ratios to find what works best for your composting.
- Temperature Check: If your compost pile does not heat up after a few days, consider replenishing materials for balance.
FAQs
1. What kitchen scraps can I compost?
You can compost vegetable peels, fruit scraps, coffee grounds, eggshells, and grains. Always avoid meat, dairy, and oily foods as they can attract pests.
2. How often should I turn my compost pile?
For hot composting, you should turn the pile every 2-3 days. For slower methods, turning can be less frequent.

3. What if my compost pile smells bad?
A foul odor usually indicates too much green material. Add more brown materials and make sure to aerate the pile to improve the smell.
4. Can I compost dried leaves and grass clippings?
Absolutely! Dried leaves are great brown material. Just ensure a balance with green materials like fresh grass clippings.
5. How long does it take to create compost?
Using the hot composting method, you can produce compost in about 10 days. Vermicomposting takes longer, typically several weeks to a few months.
6. Is it possible to compost indoors?
Yes, vermicomposting is ideal for indoor settings, allowing you to compost kitchen scraps without taking up much space.
In summary, composting your kitchen scraps can be a rewarding and eco-friendly practice. By following these simple steps, you can reduce waste and create your own nutrient-rich compost in just ten days. So roll up your sleeves and turn your scraps into gold!