Mint is a delightful herb that brings fresh flavor to various culinary delights, from cocktails to salads, and even desserts. Growing mint at home is easy, especially when you do it in water. This method requires minimal effort and provides a constantly available supply of fresh mint. In this guide, we’ll walk you through the step-by-step process of growing mint plants in water, making it very beginner-friendly.
Why Grow Mint in Water?
Before diving into the “how,” it’s good to understand the “why.” Growing mint in water offers several benefits:
Latest Posts
- With Just 1 Bottle of Water How I Was Shocked by What Happened When Growing Vegetables
- Maximize Your Home Garden with the Hanging Pea Sprout Growing Model – Space-Saving, High-Yield, and Easy-to-Manage Vertical Gardening Solution
- Just Water – The Secret to Growing Plump, White Peanut Sprouts Right at Home: A Step-by-Step Guide for Beginners
- Growing Zucchini at Home in a Container: How to Cultivate Large, Long Fruits with a 1-to-72 Day Step-by-Step Diary for Maximum Yield
- Grow Long Beans on the Terrace in Used Recycling Baskets: The Ultimate Guide to Easy, Space-Saving, and High-Yield Terrace Gardening
- How to Grow Tons of Long Beans Easily Without a Garden – A Complete Guide to Growing Healthy Yardlong Beans Without Fertilizers or Pesticides
- Easy Long Bean Growing Trick – No Garden, No Fertilizer, No Pesticide
- Grow Bitter Melon in Bottles — Harvest So Big You Can’t Eat It All! The Ultimate Guide to Bottle Gardening for Maximum Yields
- Growing Garlic Made Easy: No Soil, Fast Results – The Ultimate Guide to Growing Fresh Garlic Indoors Without Traditional Soil
- Wall-Mounted Hydroponic Watermelon System: Grow Large, Juicy, and Delicious Watermelons at Home with Minimal Space and Maximum Yield
- Simplicity: No need for soil, making it easy for anyone to start.
- Visibility: You can easily monitor root growth and water levels.
- Freshness: Constant access to mint leaves for culinary use.
- Humidity: The water provides a humid environment ideal for mint plants.
Step 1: Gather Your Materials
You will need a few simple materials to get started:
- Mint Cuttings: You can purchase them from a store or snip them from an existing plant.
- Water Container: A clear glass or vase works best, allowing you to observe the roots.
- Water: Use filtered or dechlorinated water for the best results. Tap water may contain chemicals that can inhibit growth.
Tips for Choosing Mint Cuttings:
- Look for healthy stems with vibrant green leaves.
- Choose cuttings that are around 4-6 inches long, preferably with a few sets of leaves.
- Avoid stems with browning or wilting leaves.

Step 2: Prepare the Cuttings
Once you have your mint cuttings, it’s time to prepare them:
-
Trim the Cuttings: Using clean scissors, trim the bottom of each mint stem at a 45-degree angle. This increases the surface area for root growth.
-
Remove Lower Leaves: Strip off the leaves on the lower half of the stem, ensuring no leaves are submerged in water. This prevents rot and encourages root development.
Step 3: Place Cuttings in Water
Now it’s time to place your prepared cuttings into the water:
-
Fill Your Container: Pour filtered or dechlorinated water into your container, ensuring that the cut ends of the mint stems are submerged while the leaves are above the water.
-
Position the Cuttings: Place the mint cuttings gently in the container. Make sure they don’t touch each other, as this can cause rot.
Step 4: Find the Perfect Spot
Mint thrives in bright, indirect sunlight. Choose a warm location in your home, like a windowsill, avoiding direct sunlight, which can damage the leaves and water temperature. Ideal temperatures are between 65°F and 75°F.
Light Requirements:
- Bright Indirect Light: A south or west-facing window is usually ideal.
- Avoid Direct Sunlight: Direct exposure may scorch the leaves.

Step 5: Maintain Water Levels
Mint cuttings require consistent hydration to grow healthy roots:
-
Check Water Levels Regularly: Make it a habit to check the water levels weekly. If it looks low, top it up with fresh filtered water.
-
Change the Water: Every one to two weeks, replace the water entirely to provide fresh nutrients and minimize algae growth.
Signs of Algae:
- Greenish film on the water or stems.
- Cloudy water, indicating bacteria.
Step 6: Watch for Roots
Within a week or two, you should start seeing roots emerge from the cut ends of the mint stems:
-
Root Development: Initially, the roots may be small and fragile, but they will grow quickly. Healthy roots are white and thick.
-
Time to Transplant: Once the roots reach around 2-3 inches in length, you can choose to either keep the mint in water or transplant them into soil if you prefer.
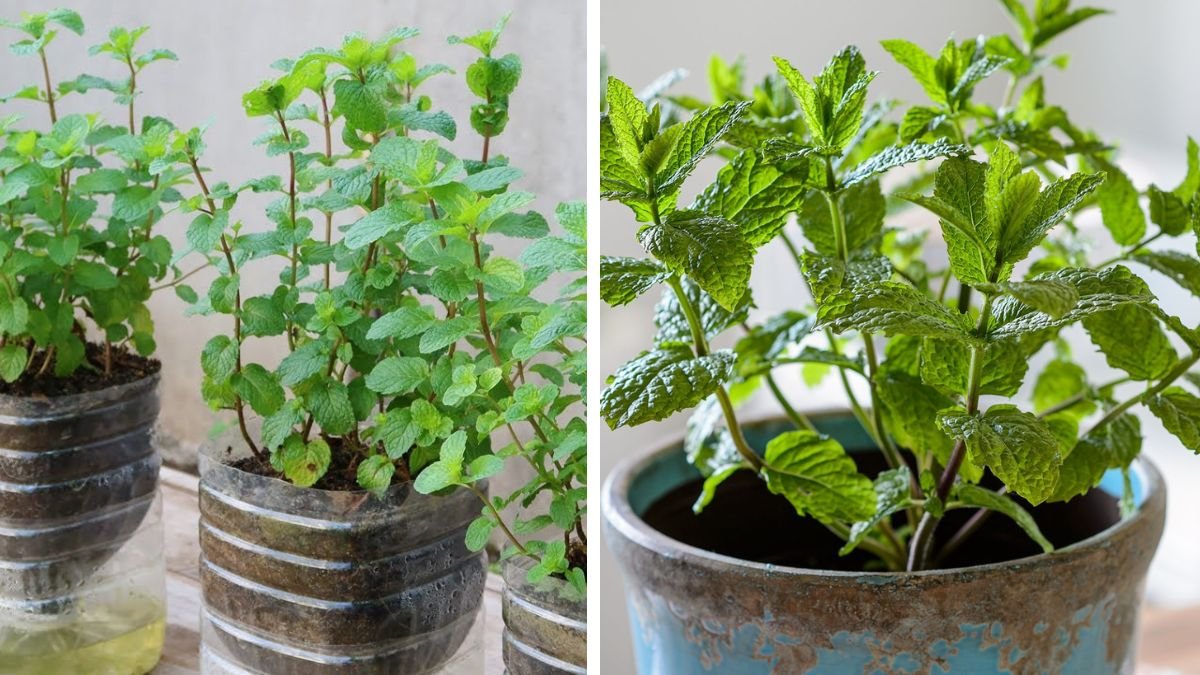
Step 7: Transplanting (Optional)
If you decide to transplant your mint cuttings into soil, here’s how to do it:

-
Choose a Pot: Select a pot that has good drainage. Mint can be invasive, so a larger pot is preferable.
-
Add Soil: Fill the pot with high-quality potting soil, ensuring it’s loose and well-draining.
-
Transplant Carefully: Make a small hole in the soil and place the rooted cuttings, gently covering the roots with soil.
-
Water Thoroughly: After transplanting, water the soil until moist but not soggy.
Step 8: Care and Maintenance
Whether you keep your mint in water or soil, basic care remains similar:
- Watering: If in soil, water regularly to keep the soil moist but not waterlogged. Check soil moisture by sticking your finger about an inch deep.
- Fertilization: If growing in soil, consider fertilizing monthly with a diluted liquid fertilizer during the growing season to encourage healthy growth.
- Pruning: Regularly pinch back the leaves to encourage bushier growth and prevent flowering, which can affect leaf flavor.
Common Issues and Solutions
-
Yellow Leaves: This may indicate overwatering or poor light conditions. Adjust your watering schedule or change the plant’s location.
-
Rotting Stems: If the cuttings are submerged too deeply, the leaves will decay. Ensure that only the bottom part of the stem is in the water while the leaves remain above.
-
Stunted Growth: Ensure adequate light. If the mint isn’t growing, it might not be getting enough sunlight.

Harvesting Mint Leaves
Once your mint is well-established, you can start harvesting:
-
Timing: Begin harvesting when the plant is at least 6-8 inches tall.
-
Technique: Use scissors to snip off leaves or stems. Harvesting regularly encourages further growth and keeps the plant healthy.
Conclusion
Growing mint plants in water can be a fun and rewarding experience, especially for beginners. Whether you’re looking to add fresh flavor to your meals or simply want to enjoy the beauty of the plant in your home, this straightforward method allows you to cultivate mint effortlessly.
FAQs
1. How long does it take for mint cuttings to root?
Mint cuttings usually take about 1-2 weeks to develop roots.
2. Do I need to change the water regularly?
Yes, changing the water every one to two weeks is beneficial for maintaining a healthy environment.
3. Can I grow mint in soil instead of water?
Absolutely! Mint can be grown in soil, but this guide focuses on water propagation for ease.
4. What’s the best way to harvest mint?

Use clean scissors to snip leaves and stems, ensuring you leave enough for the plant to continue growing.
5. Can I grow different types of mint in the same container?
It’s best to grow one type of mint per container to avoid overwhelming the space, as some varieties may outgrow others quickly.
6. Is mint invasive?
Yes, mint can be invasive if planted in the garden. Consider growing it in containers to contain its spread.
7. What’s the ideal temperature for growing mint?
Mint thrives in temperatures between 65°F and 75°F.
8. Can I use tap water for the cuttings?
It’s best to use filtered or dechlorinated water to promote healthier roots and growth.
9. How do I know when my mint is ready to harvest?
Your mint will be ready to harvest when it reaches about 6-8 inches in height and has a healthy, full set of leaves.
By following these steps, you can enjoy fresh mint year-round, enhancing your meals and refreshing your home environment. Happy gardening!