Rain lilies, scientifically known as Zephyranthes, are charming perennial flowers that showcase stunning blooms, bringing vibrant colors to gardens and landscapes. Their enchanting appearance and resilience make them a favorite among gardeners. Growing rain lilies from seeds can be a rewarding experience, allowing you to witness the life cycle of these beautiful plants. This guide will provide step-by-step instructions on how to cultivate rain lilies from seeds, along with essential care tips and a frequently asked questions (FAQs) section.
Understanding Rain Lilies
What Are Rain Lilies?
Latest Posts
- With Just 1 Bottle of Water How I Was Shocked by What Happened When Growing Vegetables
- Maximize Your Home Garden with the Hanging Pea Sprout Growing Model – Space-Saving, High-Yield, and Easy-to-Manage Vertical Gardening Solution
- Just Water – The Secret to Growing Plump, White Peanut Sprouts Right at Home: A Step-by-Step Guide for Beginners
- Growing Zucchini at Home in a Container: How to Cultivate Large, Long Fruits with a 1-to-72 Day Step-by-Step Diary for Maximum Yield
- Grow Long Beans on the Terrace in Used Recycling Baskets: The Ultimate Guide to Easy, Space-Saving, and High-Yield Terrace Gardening
- How to Grow Tons of Long Beans Easily Without a Garden – A Complete Guide to Growing Healthy Yardlong Beans Without Fertilizers or Pesticides
- Easy Long Bean Growing Trick – No Garden, No Fertilizer, No Pesticide
- Grow Bitter Melon in Bottles — Harvest So Big You Can’t Eat It All! The Ultimate Guide to Bottle Gardening for Maximum Yields
- Growing Garlic Made Easy: No Soil, Fast Results – The Ultimate Guide to Growing Fresh Garlic Indoors Without Traditional Soil
- Wall-Mounted Hydroponic Watermelon System: Grow Large, Juicy, and Delicious Watermelons at Home with Minimal Space and Maximum Yield
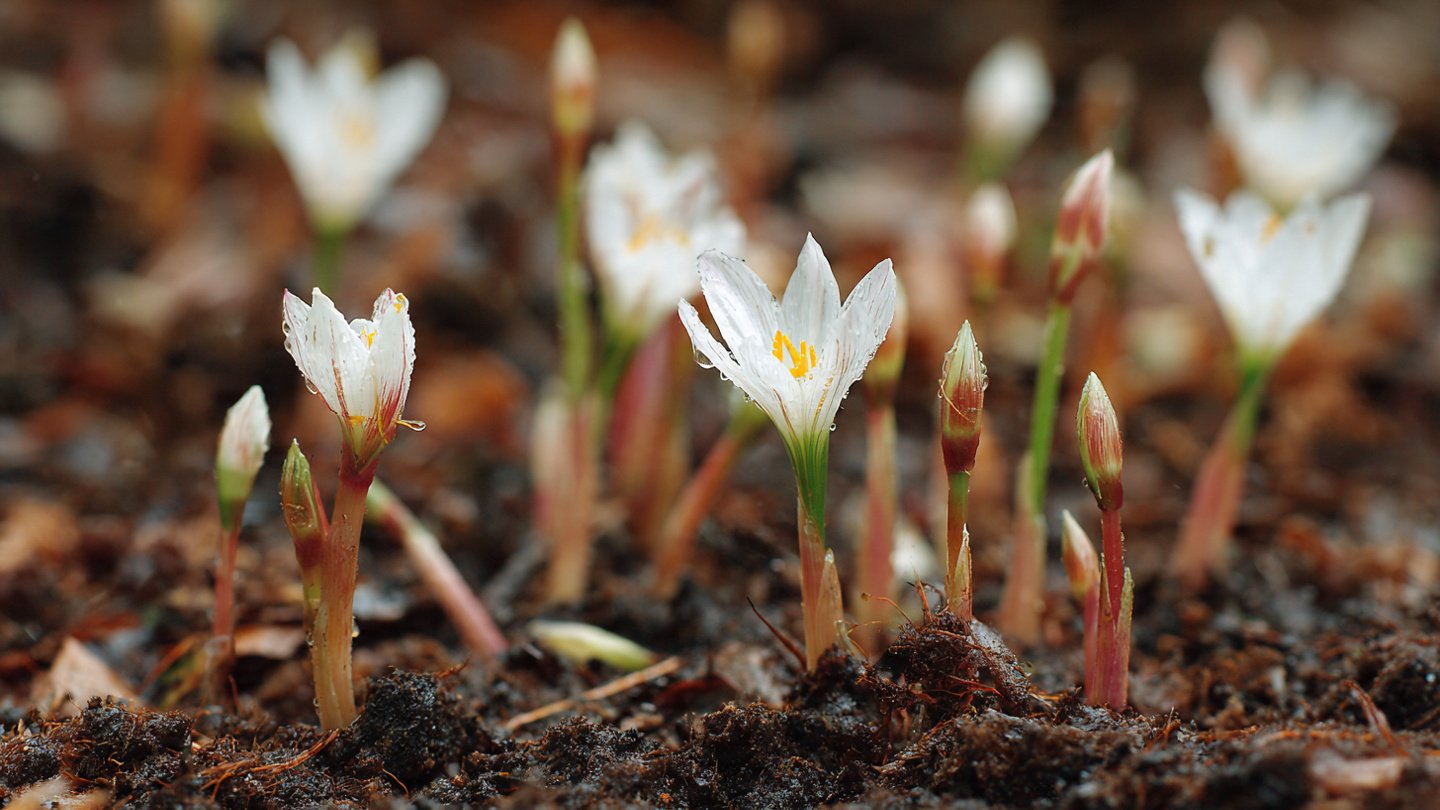
Rain lilies are often mistaken for other types of lilies but belong to the Amaryllidaceae family. They are native to regions of North America, Central, and South America. Notable for their bulbous roots, these plants thrive in various soil and climate conditions, blooming after rainfall – hence the name “rain lily.”
Various Species of Rain Lilies
There are several species of rain lilies, but some popular varieties include:
- Zephyranthes candida: Commonly known as the white rain lily, it produces delicate white blooms.
- Zephyranthes robusta: Known for its hardiness and vibrant pink flowers.
- Zephyranthes grandiflora: Recognized for its larger blooms and adaptability.
Step-by-Step Guide to Growing Rain Lilies from Seeds
Step 1: Gather Supplies

Before starting your rain lily cultivation journey, assemble the necessary materials:
- Seeds: Obtain fresh rain lily seeds from a reputable source.
- Containers: Seed trays or small pots with drainage holes.
- Potting Soil: A well-draining potting mix or a blend of potting soil and sand.
- Watering Can: For gentle irrigation.
- Plastic Wrap: To create a greenhouse effect (optional).
- Labels: To keep track of different varieties.
Step 2: Prepare the Seeds
Seed Scarification:
Some rain lily seeds benefit from scarification, which helps with germination. Gently rub the seeds on a sandpaper block or soak them in water for 24 hours before planting. This process breaks down the seed coat and encourages faster germination.
Step 3: Plant the Seeds
-
Fill Containers:
Fill your seed trays or pots with the prepared potting soil. Leave about an inch of space at the top. -
Sow the Seeds:
Plant the seeds about 1/4 inch deep in the soil. Space the seeds about 2 inches apart to allow room for growth. -
Cover the Seeds:
Gently cover the seeds with soil, ensuring they are well-acquainted with their new environment.

Step 4: Water and Germinate
-
Watering:
Water the soil lightly after planting, ensuring it is moist but not soggy. Using a spray bottle can prevent displacing the seeds. -
Creating a Humid Environment:
Cover the trays or pots with plastic wrap to maintain humidity. Place them in a warm location, ideally around 70-80°F (21-27°C).
Step 5: Light Exposure
Once you see the seeds sprouting (typically within 2-4 weeks), remove the plastic wrap. Rain lilies thrive in bright, indirect light. Position them near a window or under fluorescent lights, ensuring they receive approximately 12-14 hours of light per day.
Step 6: Thinning Seedlings
After the seedlings have developed two sets of leaves, thin them out to reduce competition for nutrients. Keep the healthiest plants, spacing them about 3-4 inches apart in their containers.

Step 7: Transplanting
Once the seedlings grow at least 4-6 inches tall and establish a strong root system (usually around 8-12 weeks), it’s time to transplant them to larger containers or directly into your garden.
-
Select a Location:
Choose a well-draining area in your garden that receives full sun to partial shade. -
Transplanting:
Carefully remove the seedlings from their containers, ensuring you do not damage the roots. Plant them at the same depth they were growing in their containers and water them thoroughly.
Step 8: Care for Your Rain Lilies
-
Watering:
Keep the soil consistently moist but avoid overwatering. Water more frequently during dry spells. -
Fertilizing:
Feed your rain lilies with a balanced, diluted fertilizer every 4-6 weeks during the growing season to promote healthy growth and vibrant blooms. -
Mulching:
Apply a layer of organic mulch around the base of the plants to retain moisture, suppress weeds, and regulate soil temperature. -
Pest Control:
Monitor the plants for pests like aphids and snails. Use organic pest control methods, such as insecticidal soap or neem oil, to manage infestations.

Step 9: Enjoy the Blooms
Depending on the specific rain lily species and growing conditions, you can expect to see blooms emerge anywhere from late spring to early fall. The blossoms usually last only a day but often produce multiple rounds of flowers.
Step 10: Collecting Seeds
Once the flowers fade, they will develop seed capsules. Collect these seeds when they turn brown and dry, and store them in a cool, dry place for future planting.
Frequently Asked Questions (FAQs)
Q1: How long does it take for rain lilies to bloom from seed?
A: It typically takes about 8-12 weeks for rain lilies to grow from seed and bloom, depending on the species and environmental conditions.
Q2: Do rain lilies require full sun or shade?
A: Rain lilies prefer full sun but can tolerate partial shade. They thrive with at least 6 hours of sunlight per day.
Q3: Can rain lilies be grown in containers?

A: Yes! Rain lilies grow well in containers, provided the pots have adequate drainage and suitable soil.
Q4: How do I care for rain lilies during winter?
A: In colder climates, it’s best to mulch around the plants to protect them from frost. If grown in pots, consider bringing them indoors when temperatures drop.
Q5: Are rain lilies deer-resistant?
A: Yes, rain lilies are generally deer-resistant due to their bulbous roots, which are not appealing to these animals.
Q6: What pests or diseases commonly affect rain lilies?
A: Common pests include aphids and spider mites. Rain lilies are usually resilient against diseases but may be susceptible to bulb rot in overly wet conditions.
Growing rain lilies from seeds is an enjoyable and fulfilling gardening endeavor. With the right techniques and care, you can create stunning displays that not only enhance your garden but also contribute to biodiversity. Happy gardening!