Hibiscus, with its large, vibrant flowers and lush green foliage, is a favorite among gardeners. These tropical plants not only add beauty to any garden but are also relatively easy to propagate, especially through cuttings. In this comprehensive guide, we’ll delve into the methods, tips, and techniques for successfully propagating hibiscus using cuttings in your home garden.
Understanding Hibiscus
Hibiscus belongs to the Malvaceae family and is known for its stunning blooms. There are many species of hibiscus, including the popular Hibiscus rosa-sinensis. This plant thrives well in warm climates but can also be grown indoors in cooler regions with adequate care.
Characteristics of Hibiscus
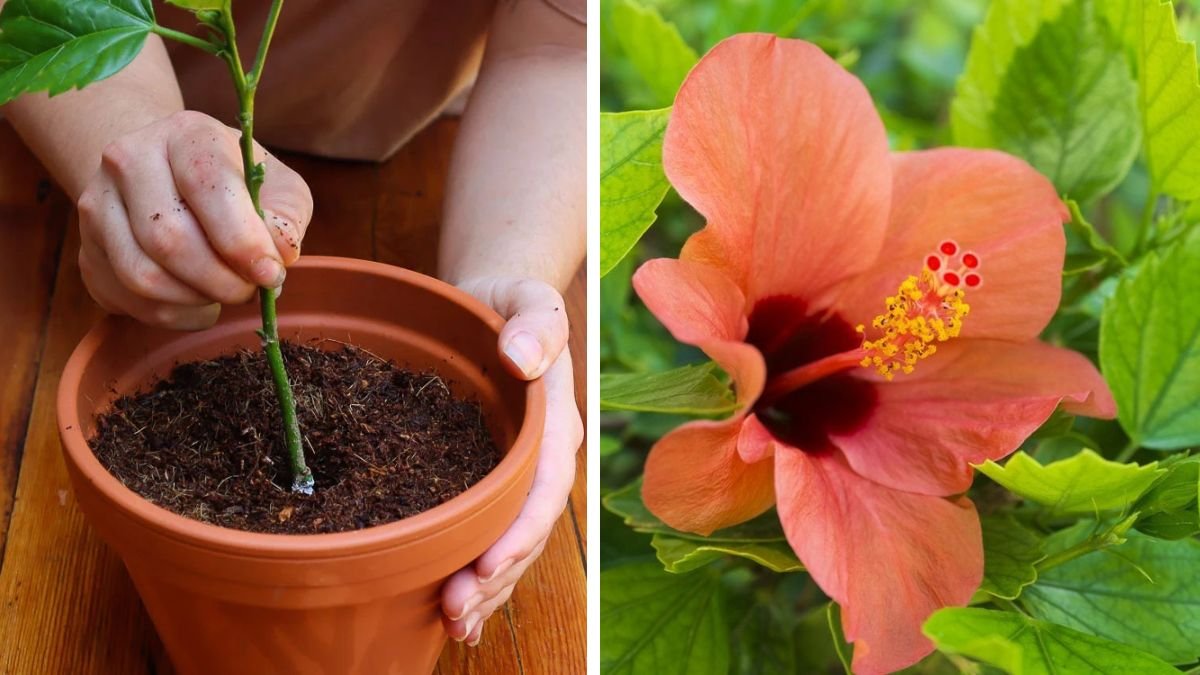
- Flowers: Hibiscus flowers are often large, measuring up to 6 inches across and come in various colors, such as red, pink, yellow, and white.
- Foliage: The leaves are typically green, glossy, and can vary in shape, often being lobed or serrated.
- Growth Habit: Hibiscus can grow as shrubs, small trees, or perennial plants, depending on the species and growing conditions.
Why Propagate Hibiscus by Cuttings?
Propagating hibiscus from cuttings is advantageous for several reasons:
- Cost-Effective: Instead of buying new plants, you can create many more plants from an existing one.
- Genetic Cloning: Cuttings ensure that the new plants will have the same attributes as the parent plant, maintaining flower color and characteristics.
- Time-Saving: While growing from seeds can take longer, cuttings establish themselves quickly, allowing for faster growth.
The Best Time to Take Cuttings
Timing is critical when propagating hibiscus cuttings. The ideal time to take cuttings is during the late spring or early summer when the plant is actively growing. During this period, the growth hormones are elevated, contributing to a higher success rate for propagation.
Tools and Materials You’ll Need
To effectively propagate hibiscus using cuttings, ensure you have the following tools and materials:
Latest Posts
- With Just 1 Bottle of Water How I Was Shocked by What Happened When Growing Vegetables
- Maximize Your Home Garden with the Hanging Pea Sprout Growing Model – Space-Saving, High-Yield, and Easy-to-Manage Vertical Gardening Solution
- Just Water – The Secret to Growing Plump, White Peanut Sprouts Right at Home: A Step-by-Step Guide for Beginners
- Growing Zucchini at Home in a Container: How to Cultivate Large, Long Fruits with a 1-to-72 Day Step-by-Step Diary for Maximum Yield
- Grow Long Beans on the Terrace in Used Recycling Baskets: The Ultimate Guide to Easy, Space-Saving, and High-Yield Terrace Gardening
- How to Grow Tons of Long Beans Easily Without a Garden – A Complete Guide to Growing Healthy Yardlong Beans Without Fertilizers or Pesticides
- Easy Long Bean Growing Trick – No Garden, No Fertilizer, No Pesticide
- Grow Bitter Melon in Bottles — Harvest So Big You Can’t Eat It All! The Ultimate Guide to Bottle Gardening for Maximum Yields
- Growing Garlic Made Easy: No Soil, Fast Results – The Ultimate Guide to Growing Fresh Garlic Indoors Without Traditional Soil
- Wall-Mounted Hydroponic Watermelon System: Grow Large, Juicy, and Delicious Watermelons at Home with Minimal Space and Maximum Yield
- Sharp Pruning Shears: For clean cuts that reduce damage to the plant.
- Potting Mix: A well-draining potting mix designed for seedlings.
- Clean Containers: Small pots or trays with drainage holes.
- Rooting Hormone: Optional, but can significantly enhance root development.
- Plastic Wrap or a Humidity Dome: To maintain humidity around the cuttings.
- Water: For hydration.
Steps to Propagate Hibiscus from Cuttings
1. Selecting the Right Cuttings
Choose healthy stems from the parent plant. The best cuttings are:

- Semi-Hardwood Stems: These are mature stems that have grown in the current season but are not completely woody. Look for stems with vibrant green color.
- Length: Cuttings should be approximately 4 to 6 inches long and should have at least two sets of leaves.
2. Taking the Cuttings
Using sharp pruning shears, follow these steps:
- Cut Just Below a Node: The node is where leaves are attached to the stem; this is where roots will emerge. Make your cut at a 45-degree angle.
- Remove Lower Leaves: Trim any leaves on the lower half of the cutting to prevent rot and reduce moisture loss. Leave at least one or two leaves at the top.
3. Application of Rooting Hormone
While optional, applying rooting hormone can enhance root development:
- Dip the cut end of each cutting into the rooting hormone powder, tapping off any excess. This promotes faster rooting.
4. Preparing the Soil
Use a well-draining potting mix to plant your cuttings:
- Moisten the Potting Mix: Not overly soggy, but damp enough to provide hydration.
- Fill your Containers: Use small pots or propagation trays with drainage holes.
5. Planting the Cuttings
Follow these steps to plant the cuttings:
- Make a Hole: Use a pencil or your finger to create a hole in the potting mix.
- Insert the Cutting: Place the cut end of the cutting into the hole and gently press the soil around it to secure.
- Water Gently: After planting, give them a light watering to settle the soil.
6. Creating a Humid Environment
To encourage root growth, maintaining humidity is crucial:
- Cover with Plastic: You can cover the cuttings with plastic wrap or a humidity dome to retain moisture.
- Air Circulation: Make sure to ventilate occasionally to prevent mold growth.
7. Care During Root Development
During the rooting phase, typically lasting 2-8 weeks, your cuttings will need care:

- Light: Place the pots in a warm, bright location, but avoid direct sunlight which could scorch the cuttings.
- Water: Keep the soil consistently damp but not soggy. Overwatering can cause rot.
8. Checking for Roots
In about 2-4 weeks, gently tug on the cuttings. If you feel resistance, roots are forming.
9. Transplanting
Once the cuttings have developed healthy roots, it’s time to transplant them into larger pots or the garden:
- Select a Site: Choose a location with adequate sunlight and well-drained soil.
- Prepare the New Containers or Garden Bed: Use rich soil mixed with organic matter.
- Transplant Gently: Remove the cutting from the pot, taking care not to damage the roots, and place it in the new location.
Care for New Hibiscus Plants
Watering
Water regularly but avoid waterlogging. Newly transplanted hibiscus plants need consistent moisture to support their growth.
Fertilization
After about a month, start fertilizing with a balanced fertilizer to promote growth. Follow the instructions on the fertilizer package for the correct application.
Pruning
Regular pruning will encourage bushier growth and more flowers. Remove any dead or damaged branches and pinch back the tips of new growth.
Potential Challenges
While propagating hibiscus through cuttings is generally easy, you may face some challenges:

- Rotting: Overly wet soil can cause cuttings to rot. Ensure drainage and avoid excessive watering.
- Pests: Watch for pests such as aphids and spider mites. Treat infestations promptly using insecticidal soap.
- Molds and Fungal Issues: Maintain good air circulation to prevent mold.
Conclusion
Propagating hibiscus from cuttings is a rewarding process that allows you to expand your garden while maintaining the beautiful features of the parent plant. With the right techniques and care, you can enjoy a continuous supply of these stunning blooms in your home garden.
FAQs
1. How long does it take for hibiscus cuttings to root?
Typically, hibiscus cuttings can take 2-8 weeks to root, depending on environmental conditions.
2. Can I propagate hibiscus in water?
While it’s possible to root hibiscus cuttings in water, it’s recommended to use soil for better success rates and stronger roots.
3. What is the best type of soil for rooting hibiscus cuttings?

A well-draining potting mix is ideal. You can also mix in perlite or sand to enhance drainage.
4. Do all types of hibiscus propagate well from cuttings?
Most species of hibiscus can be propagated through cuttings, but success rates may vary depending on the specific type and environmental conditions.
5. When is the best time to take hibiscus cuttings?
Late spring to early summer is the best time, when the plant is actively growing.
By following this guide, you will be well on your way to successfully propagating hibiscus in your home garden. Enjoy the journey of nurturing and watching your beautiful hibiscus plants grow!
